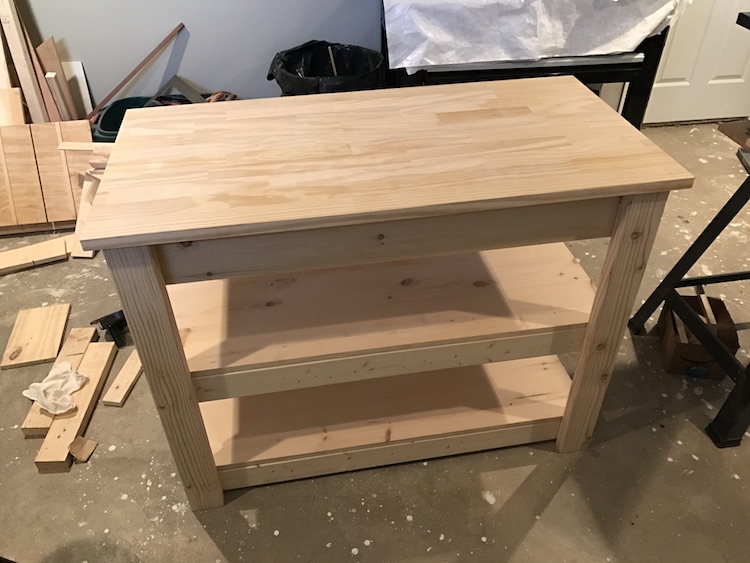
If you have a smaller kitchen and need some more shelving for all of your utensils and kitchenware, these kitchen island plans are what you're looking for.
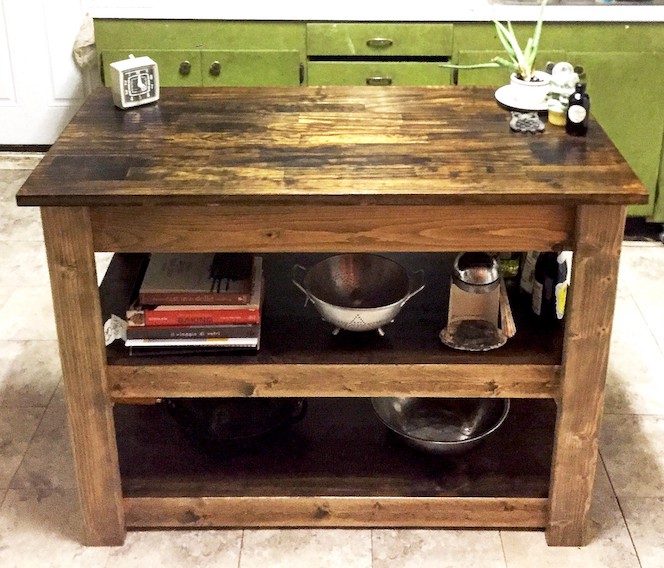
So a few months back my step-sister, Elizabeth, had asked if I could make her a kitchen island. She lives in a row home in Philadelphia and didn't have much space in her kitchen so was looking to add more places to put all of her utensils and other kitchenware.
Always on the lookout for another project I was excited to make a kitchen island. After figuring out the size, we settled on the kitchen island plans I'm sharing today. It's actually inspired by two different plans I found on Ana White's site when looking for kitchen island plans, here and here.
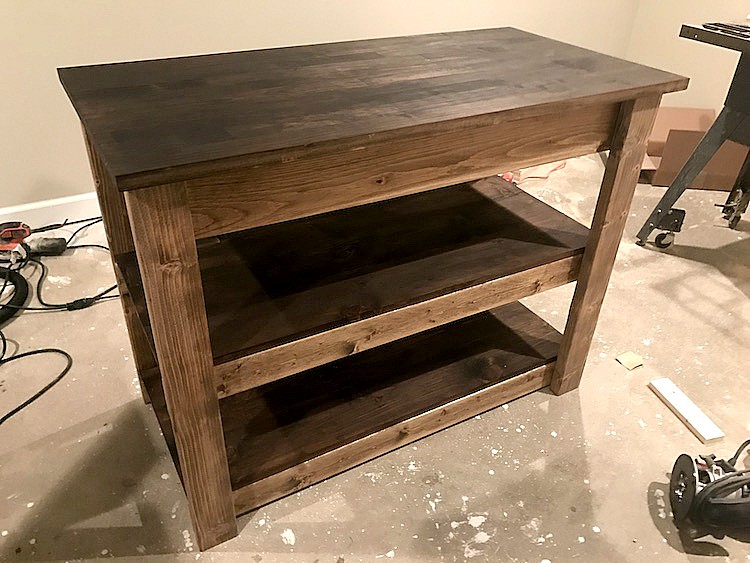
Luckily for me, Elizabeth loved how the DIY kitchen island turned out and is making great use out of it. So if you're looking into building a kitchen island or just some DIY projects, give this a try. Or maybe this inspires you to make your own kitchen island plans like I did!
Tips for these Kitchen Island Plans
- Pine wood is the cheapest and easiest to work with for these kitchen island plans, but if you want a harder wood, go with oak.
- For staining, I prefer Danish oil as it stains and protects the kitchen island.
- You can make your own top gluing together pine wood, but it is easier to just by a common board.
Other Furniture Projects
If you’ve tried these Kitchen Island Plans or any other project on Chisel & Fork, please let me know how it turned out in the comments below! You can also follow me on Facebook, Instagram, Pinterest and YouTube to see more projects, meals and anything else I'm up to.
Kitchen Island

If you have a smaller kitchen and need some more shelving for all of your utensils and kitchenware, these kitchen island plans are what you're looking for.
Materials
- (4) 2″ x 4″ x 8′ pine wood
- (3) 1″ x 4″ x 8′ pine wood
- (2) 1″ x 3″ x 8′ pine wood
- (2) 1″ x 6″ x 8′ pine wood
- (1) 1″ x 24″ x 48" common board
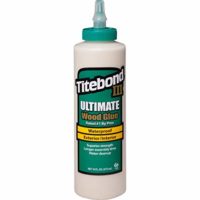
- Wood glue
- 1 ¼" screws
- 1 ¼″ pocket-hole screws
- Stain or paint
Tools
- Table saw
- Miter saw
- Hand sander and sandpaper
- Kreg jig
Instructions
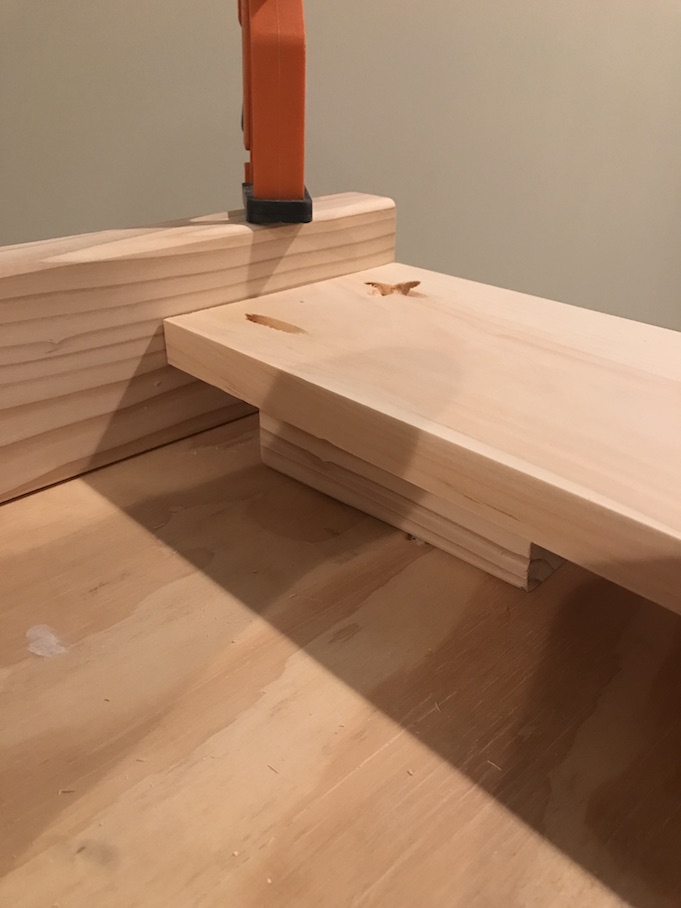
- Make the following cuts: (4) – 2″ x 4″ @ 35″, (6) – 1″ x 8″ @ 46″, (4) – 1″ x 3″ @ 46″, (2) – 1″ x 6″ @ 41 ½″, (2) – 1″ x 6″ @ 19 ¾″. Using the table saw you'll need to trim down the 1x8's so the shelves fit. There are (6) 1x8s @ 46". 4 of the 1x8s need to be cut to 6 ¾" wide and the other 2 need to be cut to 6 ¼" wide. That way you can put 3 of the boards together to equal 19 ¾". Using Kreg jig, drill 5 holes into 1x8s. Glue and screw together 3 pieces of the 46" 1x8s with the two 6 ¾" wide pieces on the outside and the 6 ¼" wide piece on the inside. Repeat with the second shelf.

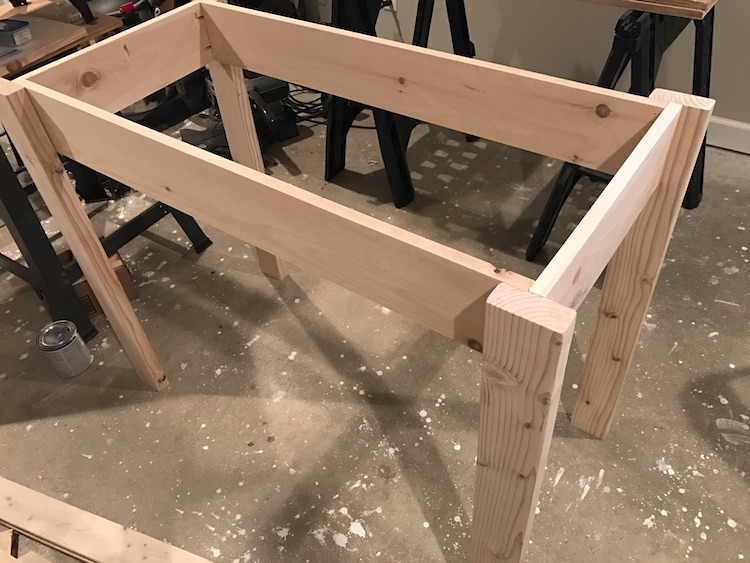
- Using the Kreg jig, attach the 1x6s @ 19 ¾" to the 2x4s with 1 ¼" pocket-hole screws. You want it set in 1 ½".
- Attach the two 1x6s @ 41 ½" to the 2x4s. You can use 1 ¼" screws and screw into the 2x4s. You don't have to use the Kreg jig here as it's against the other 1x6s.

- Attach the 1x3s as the side rails to the 2x4s. You want the top of the bottom two side rails to be 3 ½" from the ground. Use 1 ¼" screws and screw into sides of 2x4s. You want the other two 1x3 side rails to 16 ½" off the ground, using 1 ¼" screws to screw into side.
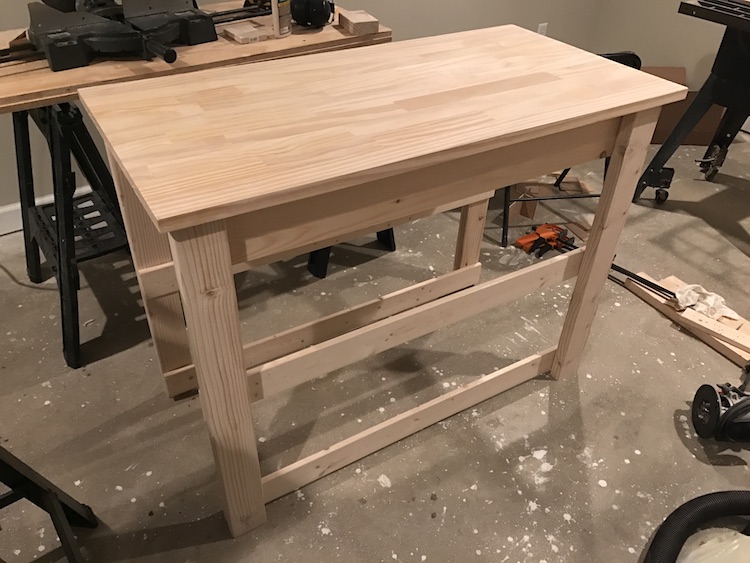
- Glue and screw in both shelves into the side rails. It should fit snug in between the legs. Using Kreg jig, drill holes in the 1x6 side rails so you'll be able to attach top. Glue and drill 1 ¼" pocket-hole screws into top shelf which is the 24x48 common board. You'll want it 1" from the sides.
- Stain or paint. Protect with polyurethane.
Notes
- Pine wood is the cheapest and easiest to work with for these kitchen island plans, but if you want a harder wood, go with oak.
- For staining, I prefer Danish oil as it stains and protects the kitchen island.
- You can make your own top gluing together pine wood, but it is easier to just by a common board.


Cristine says
The island came out great. I too am inspired by Ana White and end up with too many projects whenever I go to her site. Now I'm afraid you've got me planning another one. Thanks for sharing
Ryan says
Thanks! I believe I've made about 10 different projects from her site so far!