


This post may contain affiliate links. Please read my disclosure.
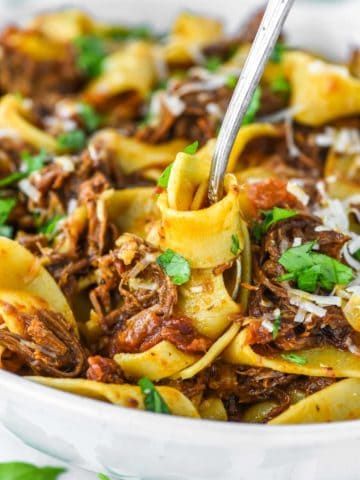
With layers of arborio rice, meat sauce and cheese, this risotto al forno or Italian baked rice is a comforting dish that everyone will enjoy.

I'm a huge fan of risotto - from pear risotto to chicken and leek risotto to sweet potato risotto.
But have you ever baked risotto? It is traditionally just cooked on the stovetop. However, since you bake this dish, you get that creaminess you love from risotto, but also pockets of crispiness from the cheese being baked.
This dish actually comes from Campania region of Italy and is traditionally called riso al forno. It is very similar to lasagna, but with rice instead of noodles.
Why This Recipe Works
Flavorful - if you love lasagna, you'll love this dish as you get layers of meat sauce, cheese and in this case, rice, instead of noodles.
Comforting - cheese, meat and rice are a combination that is hard to top.
Perfect for a crowd - since this is in a large baking dish, you can prepare right before and just have a spoon ready for guests to take however much they want.
Jump to:
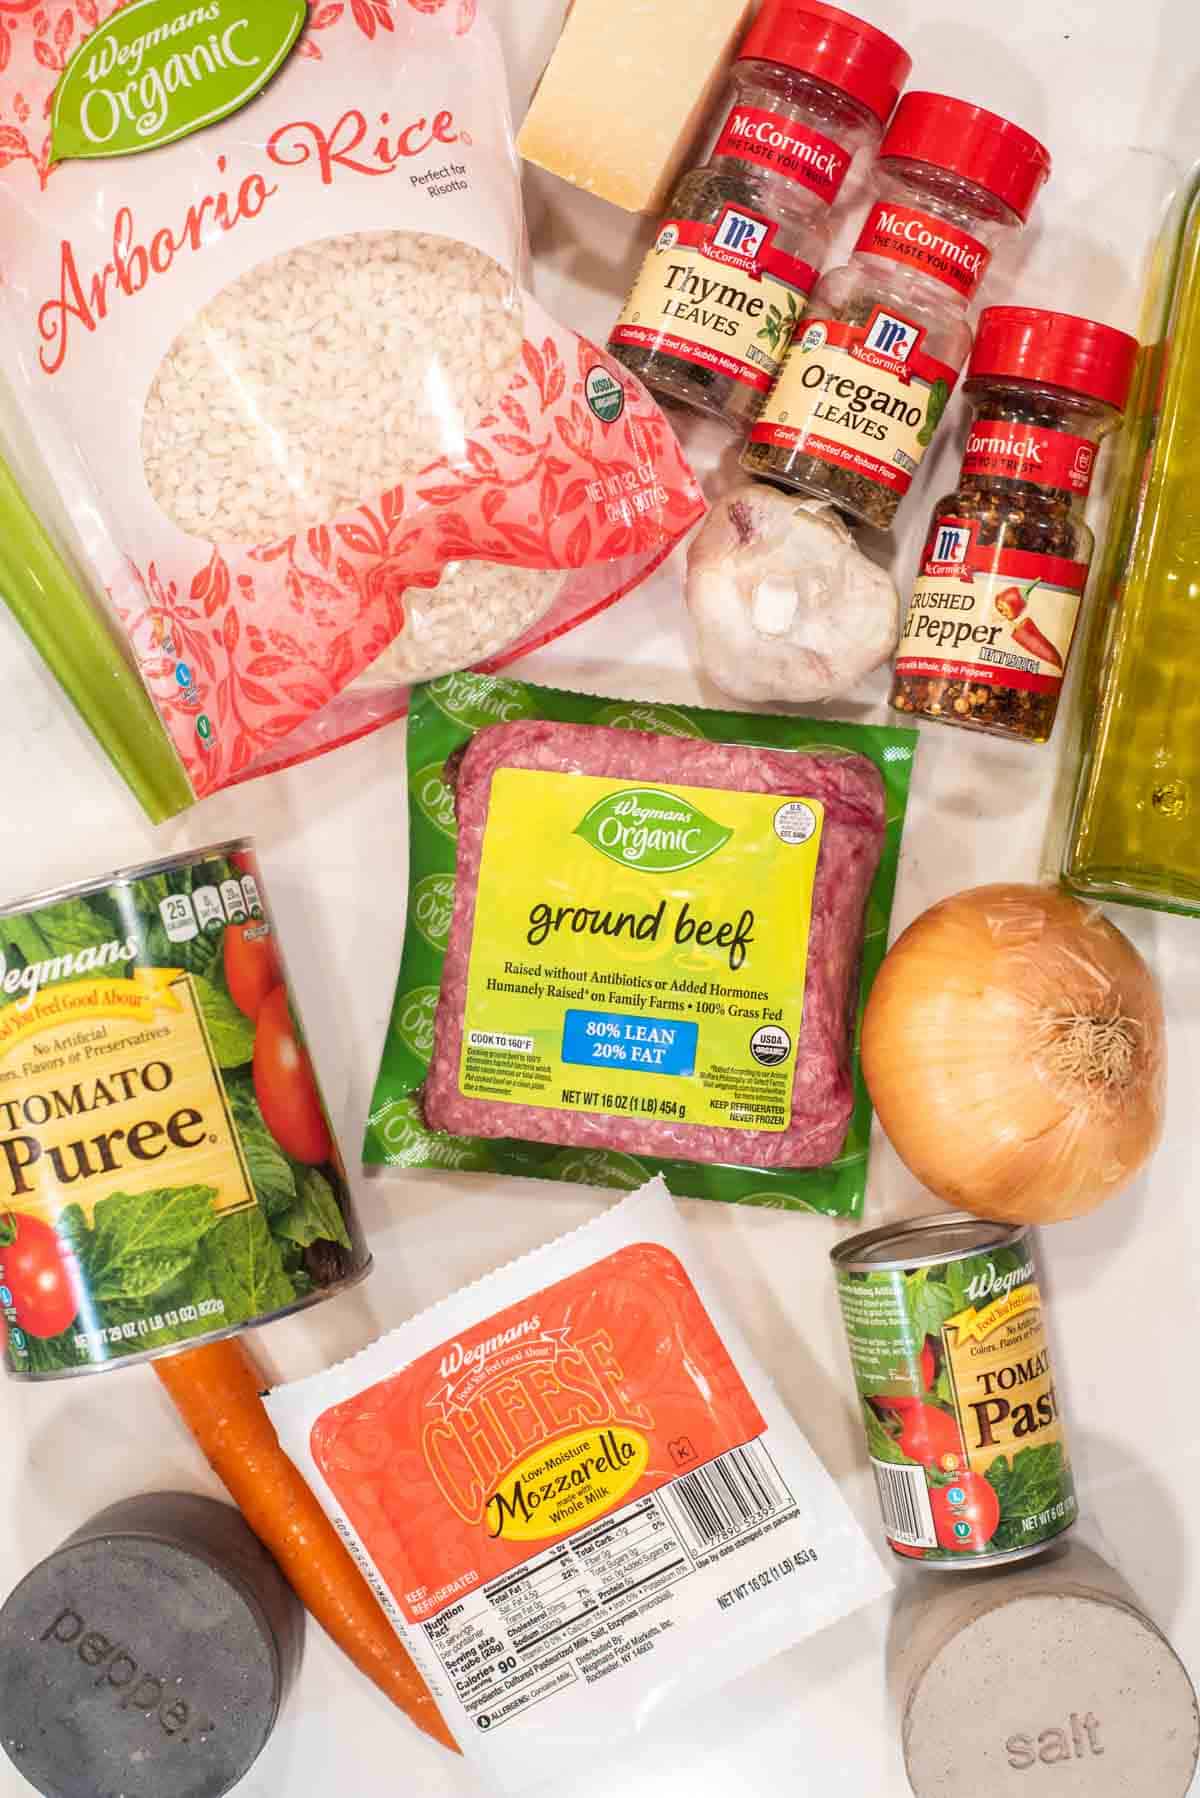
Ingredient Notes
- Mirepoix - the combination of onion, carrot, celery and garlic is the base for almost any braised recipe. By pureeing it before cooking, you help intensify the flavor.
- Beef - I'm a fan of the traditionally ground beef.
- Tomatoes - using a combination of tomato puree and tomato paste helps thin the sauce but also adds a rich tomato flavor.
- Rice - since this is an Italian dish, you need to use Arborio rice.
- Cheese - by adding some fresh mozzarella and Parmesan cheese both in the middle and on top of the dish, you get pockets of cheese throughout.
Ingredient Swaps
While this recipe is pretty perfect, you can mix up the ingredients. Some variations include:
- While ground beef works great, you can also use ground pork, chicken or turkey.
- I like to use dry white wine for a more fruity flavor, but red wine can also be used if you want more richness.
- It is called risotto al forno for a reason which traditionally uses Arborio rice, but you can also use basmati or jasmine rice.
- While not included in the recipe, you can add additional veggies like mushrooms, zucchini and peppers or even olives, which is a fruit in case you didn't know!
Step-by-Step Photos
Please note full ingredient list and instructions can be found in recipe card below.
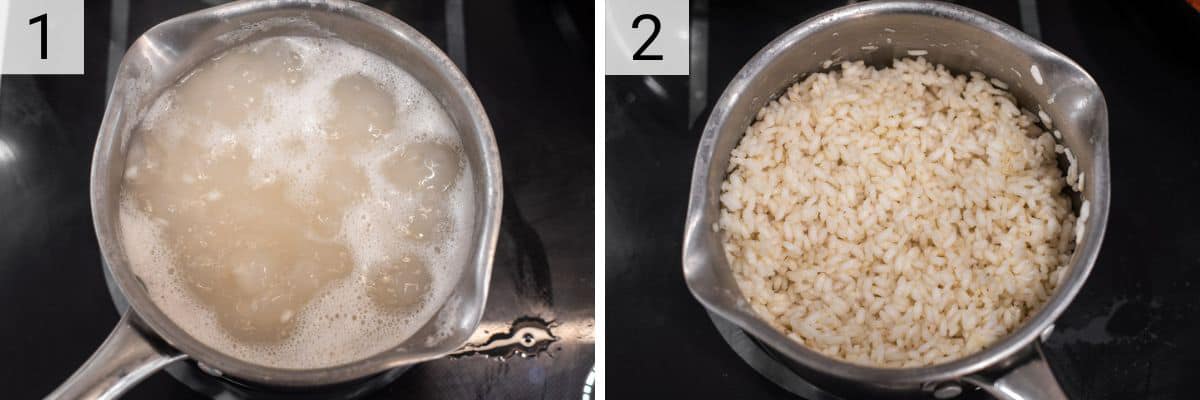
First you need to parboil the rice. Add rice to a pot of salted boiling water and cook for 10 minutes. Drain and rinse under cold water to stop the cooking process.
Stir in 1 tablespoon of olive oil and half the Parmesan cheese and set aside.
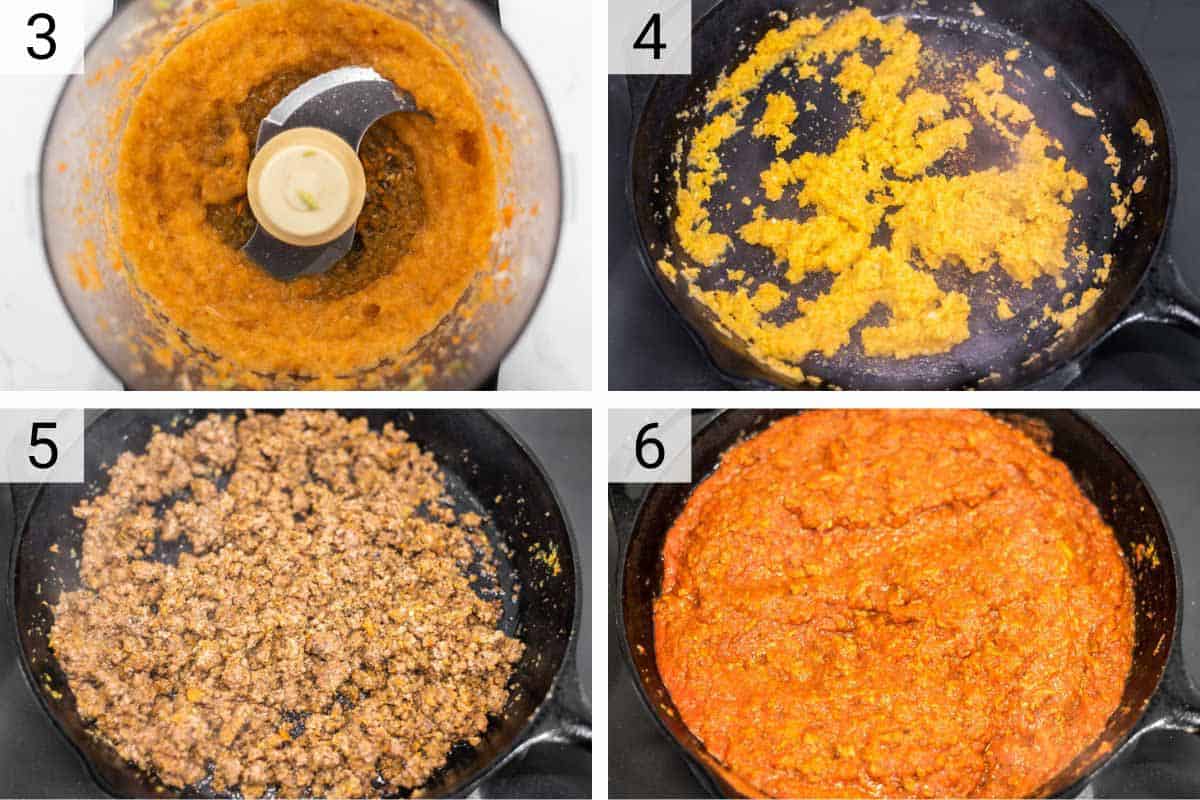
Puree the veggies in a food processor until a paste forms. Add to a large skillet with olive oil over medium-high heat. Cook for 10 minutes.
Stir in the ground beef, crumbling with a wooden spoon and cooking for 5 minutes.
Add the dried herbs and red pepper flakes before adding the tomato puree, paste, salt and pepper. Bring to a boil before lowering heat and simmering for 10 minutes.
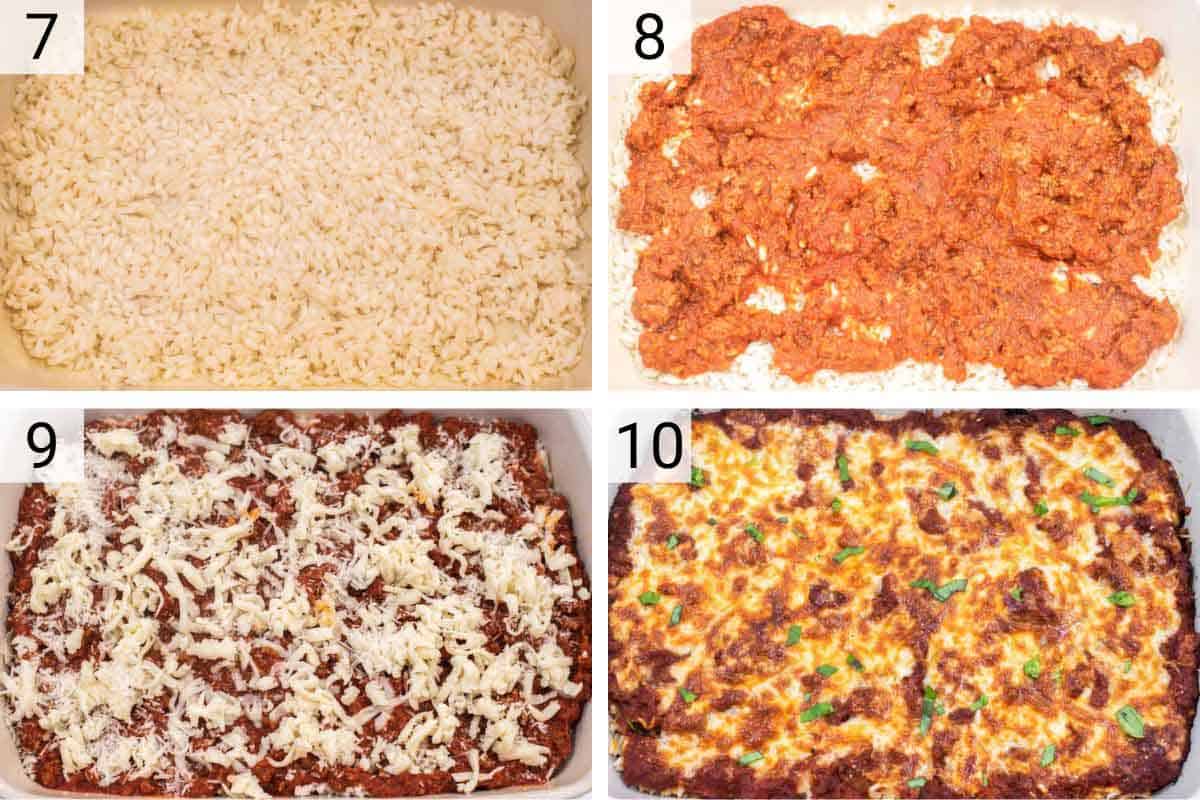
Spray a 9x13 pan with cooking spray. Add half of the rice, before adding half of the meat sauce and half of the cheese. Repeat the process.
Bake at 400°F for 15-20 minutes or until the top is golden brown and bubbly.
FAQs
"Al forno" translates to baked in the oven in Italian. It could be applied to bread, pizza, pasta or in this case - rice.
Yes. You can assemble the dish up to 8 hours ahead of time and place in the fridge. You'll need to add 10-15 minutes of baking time.
This risotto al forno will last about 3 days if stored in an airtight container in the fridge.
You can also keep in the freezer for up to 3 months.
My preferred method is just reheating in the dish. Cover and bake at 325°F until warmed through.
You can also microwave. Place in a microwave-proof bowl with a splash of water and microwave for 1 minute. Stir and microwave for another minute or until heated through.
Side Dish Suggestions
While this risotto al forno recipe is perfect on its own. You can serve with a variety of sides including:
Equipment
The equipment you use is important to how the recipe turns out. What is needed is the following:
- Skillet/Dutch oven - you want something large enough to be able to cook the beef and sauce.
- Wooden spoon - used to break up the meat and toss the sauce.
- Baking dish - you want a 9x13 baking dish for the pasta.
Pro Tips/Recipe Notes
- You can skip pureeing the veggies and just cook in the skillet before adding the beef if you prefer.
- Parboil the rice as it will cook more when baking in the oven.
- Don't use pre-shredded cheese. It contains wood pulp and preservatives so it doesn't melt well.
- Let the dish rest for 10 minutes so you can get a clean scoop of everything out.

Other Italian Recipes


If you’ve tried this risotto al forno recipe or any other recipe on Chisel & Fork, please let me know how it turned out in the comments below! You can also follow me on Facebook, Instagram, Pinterest and YouTube to see more tasty meals and anything else I'm up to.

Risotto al Forno
Ingredients
- 2 cups arborio rice
- 3 tablespoon olive oil, divided
- ½ large sweet onion, diced
- 1 large carrot, diced
- 1 rib celery, diced
- 4 cloves garlic, minced
- 1 lb ground beef
- 1 tablespoon dried oregano
- ½ teaspoon dried thyme
- ¼ teaspoon crushed red pepper flakes
- 1 (28 oz can) tomato puree
- 2 tablespoon tomato paste
- 1 teaspoon sea salt
- ½ teaspoon black pepper
- 2 cups shredded mozzarella cheese
- 1 cup freshly grated Parmesan cheese
Instructions
- Preheat oven to 400°F. Coat a 9x13 pan with cooking spray and set aside.
- Bring a large pot of salted water to a boil. Cook the rice for 10 minutes. Drain and rinse under cold water to stop the cooking process. Transfer to a bowl with 1 tablespoon of olive oil and ½ cup Parmesan cheese.
- Add the onion, carrot, celery and garlic to a food processor and puree until a paste forms. Heat remaining olive oil in a large skillet over medium-high heat. Add the pureed veggies and cook until the water has evaporated and they have become brown, about 10 minutes.
- Add the ground beef, crumbling the meat with a wooden spoon. Cook for about 5-7 minutes or until the meat is cooked through and beginning to brown.
- Stir in the oregano, thyme and red pepper flakes and cook for an additional minute. Add the tomato puree, tomato paste, salt, and pepper, stirring to combine. Bring to a boil and then lower the heat, simmering for 10 minutes.
- Add half of the rice to the baking dish. Add half of the meat mixture, before adding 1 cup of mozzarella and ¼ cup Parmesan cheese. Add the remaining rice and top with the remaining meat mixture and cheese. Bake for 15-20 minutes or until the top is golden brown and bubbly.
Notes
- You can skip pureeing the veggies and just cook in the skillet before adding the beef if you prefer.
- Parboil the rice as it will cook more when baking in the oven.
- Don't use pre-shredded cheese. It contains wood pulp and preservatives so it doesn't melt well.
- Let the dish rest for 10 minutes so you can get a clean scoop of everything out.


C says
Loved this! I think I might even prefer it to lasagna because the rice takes on the flavor from the sauce. I used ground italian sausage for the meat. This will definitely be in my regular rotation!
Ryan says
Glad you enjoyed it!