This post may contain affiliate links. Please read my disclosure.
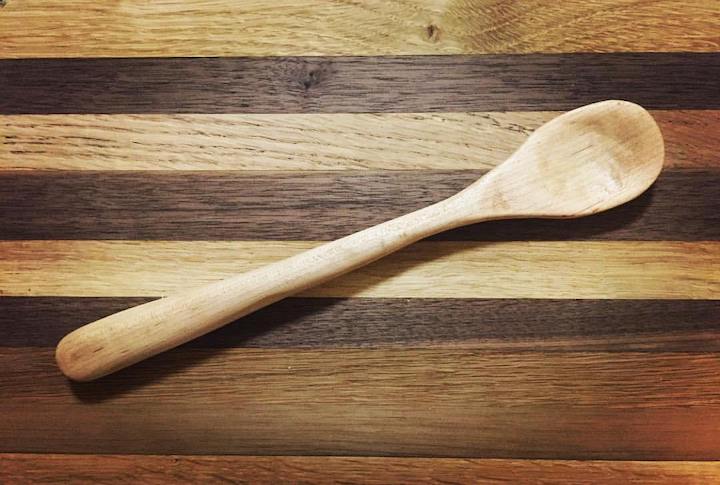
This DIY wooden spoon is made of a non-toxic hardwood like oak, maple or cherry and is the perfect gift for someone who likes to cook.
When you look at a wooden spoon it may seem pretty simple and easy to make, and while it's definitely on the easy side, it takes a decent amount of time to look how you want! Like usual, I took a class on how to make a wooden spoon at Station North Library about a year and a half ago and have made a few spoons since then.
As far as tools you don't need much - really just a band saw, some carving tools and sandpaper. The problem is the sanding... I don't know how others feel about woodworking, but the one thing I really don't enjoy is sanding, especially when it comes to spoons. You have to sand and sand and sand everything to get that smooth and curvy texture you want. Your patience will be tested for sure.
The good thing is at the end, you will have a beautiful looking spoon that you can either use yourself in the kitchen or give as a gift. Since I started this blog I haven't actually made a handmade wooden spoon, so I don't have any step-by-step directions but will give you the basic rundown. Down the road I'll have some instructions!
Wooden Spoon Shopping List:
- 2" x 4" @ 2' hardwood (Oak, Maple, Cherry)
- 80, 150, 220 grit sandpaper
- Cutting board oil (I use Howard)
- Tape
Tools
- Band Saw
- Carving tools
- Clamps
- Hand sander
How to Make a Wooden Spoon:
The most important thing with a DIY wooden spoon is to use a non-toxic hardwood. The best overall is probably maple, which is what I've made all my spoons with. You want a piece of wood wide enough and long enough to make the size spoon you want. The great thing about homemade spoons is you can make it look however you want. It can have a curve or be rigid or have some grooves. Just use your imagination.
When you decide what you want your spoon to look like, you draw it out on the top of the wood and the side profile on the side of the wood. Before cutting I recommend drawing a circle at the spoon end and start carving away. It's easier to carve now as opposed to when it's already cut out since you have more wood to be able to clamp down. You'll want to carve until you have a big enough crater for the spoon. (This will take some time)
Once carved, you want to cut the side profile out first with the band saw. Now tape everything back together and then cut the top profile out. This allows you to have an even surface to cut.
Now the spoon profile is done and it just is all about sanding at this point. As I mentioned earlier this will take quite some time. You'll want to use all 3 types of grit. Once it's smooth, put some cutting board oil on it to protect it.
Sylvia Duer says
I am the grateful recipient of one of Ryan's beautiful handmade wooden spoons. Mine is very special. He wood burned "GRANDMA'S KITCHEN" on one side of the handle, and "RYAN LOVES YOU" on tbe other side. He told me my spoon is not just a decoration. I am to use it, and I do. It is especially beautiful; a real treasure to me!
Ryan says
I'm glad you use it!