This post may contain affiliate links. Please read my disclosure.
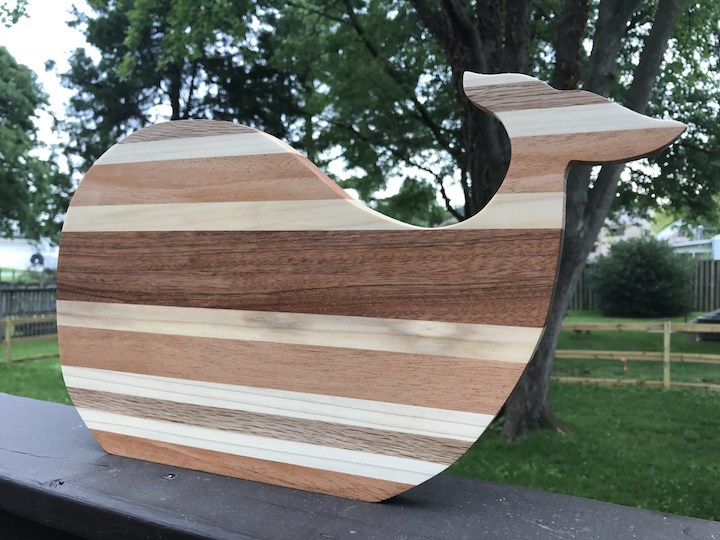
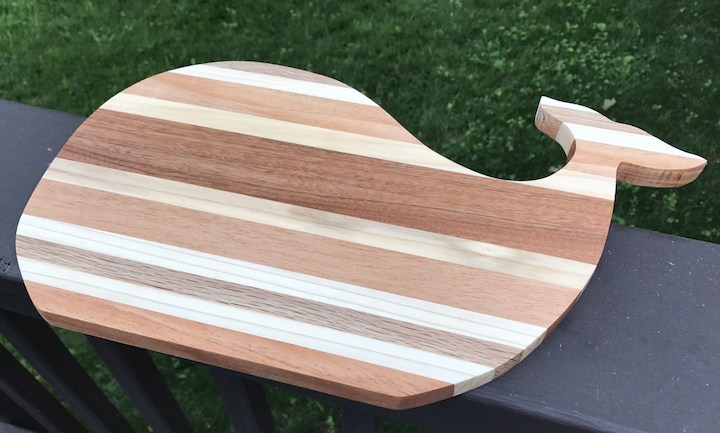
Instead of just a boring cutting board, this whale cutting board is really unique and the perfect gift for someone that has a beach house or loves whales.
So with all of the different wood projects I've made in the past couple of years, I still get the most satisfaction out of making cutting boards.
I just love the beauty of how every cutting board can look completely different with the different types of wood used. Perhaps it's also the cook in me that appreciates a good cutting board!
A few months ago my in-laws purchased a beach condo in Delaware. It also happened to be my father-in-laws birthday in August. I immediately knew I was going to make a cutting board for his birthday/housewarming gift.
Instead of just a standard board though, I wanted to make something more unique that could fit the beach theme. So I debated between a surfboard, turtle and whale. After consulting with the rest of the family I settled on a whale-shaped cutting board.
I couldn't be more happy with how this cutting board turned out. I remember telling my wife once I was done that I really wanted to keep it for myself!
I guess I'll just have to make another animal shaped cutting board done the road. So for anyone out there that is considering making a cutting board, you could always make it more unique and cut it to the shape of an animal. Hope you give this whale cutting board a try!
Pro Tips/Notes
- When making a homemade cutting board, you want to use hardwood as it can take the abuse of the knife since you are actually cutting on it. The main types of hardwood used for cutting boards are oak, walnut, maple and cherry with maple probably being the most popular.
- Don't worry about going overboard on the glue. You will sand it off if it leaks out.
- Let the glue set for at least 24 hours before going through the planer.
- Don't skip spraying the cutting board with some water after the first sanding to make sure the grain rises to sand again.
Similar Projects
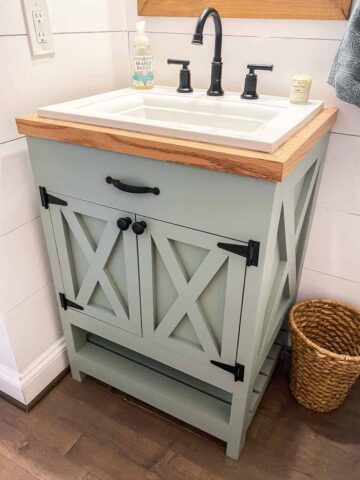
- DIY Wine Cabinet
- Handmade Wooden Coffee Scoop
- Kitchen Island
- Beer Caddy
- Wooden Spoon
- Magnetic Beer Bottle Opener
If you’ve made this whale cutting board or any other project on Chisel & Fork, please let me know how it turned out in the comments below! You can also follow me on Facebook, Instagram, Pinterest and YouTube to see more projects, meals and anything else I'm up to.
Whale Cutting Board
Instead of just a boring cutting board, this whale-shaped cutting board is really unique and the perfect gift for someone that has a beach house or loves whales.
Materials
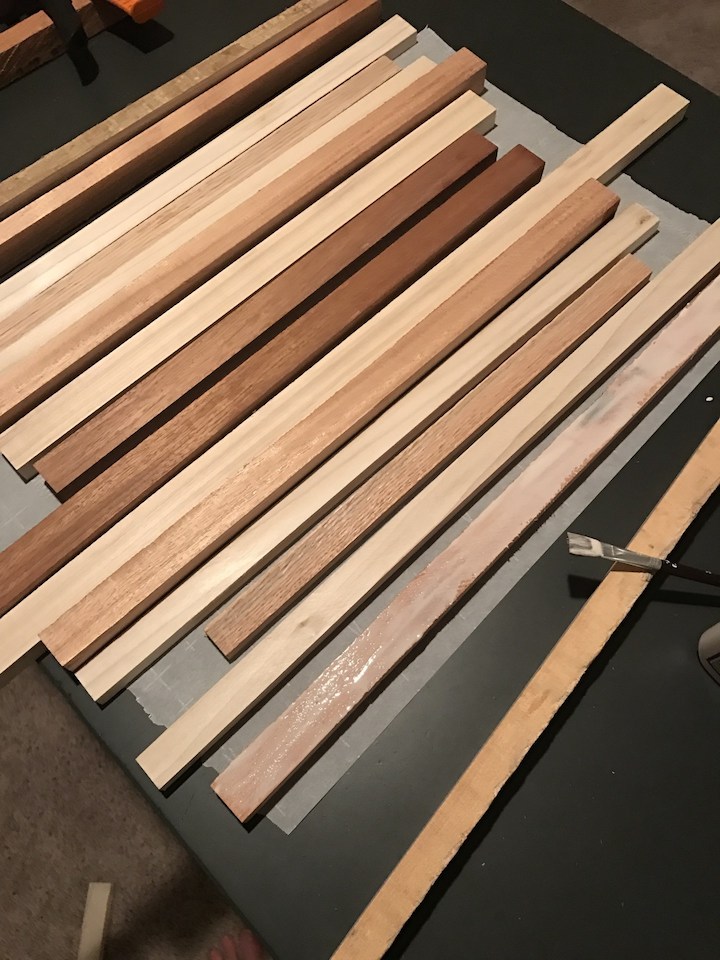
- Hardwood scraps at 14 inches in length (Oak, Walnut, Maple, Cherry, Teak)
- Titebond III wood glue
- 80, 150, 220 grit sandpaper
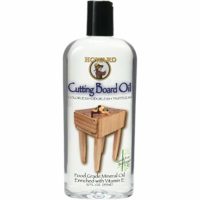
- Cutting board oil
Tools
- Table saw
- Miter saw
- Jointer
- Planer
- Bandsaw
- Clamps
- Hand sander
Instructions
- The best time to make a cutting board is when you have leftover strips of wood that you can either strip down more or just use as is. And that's exactly what we did in our woodworking class. We just used leftover pieces of wood. All that a cutting board is, is multiple strips of wood glued together and sanded down. So in order to make it where you can actually glue the wood together, you have to put each strip of wood through the jointer on two sides. A jointer is used to create flat, smooth services on the wood. You can do all four sides along the jointer but found it easier to move to table saw after first two sides were smooth.
- After each piece has been through the jointer you need to have the wood go through the table saw to get the exact width you want (Note - make sure you put the two sides that were put through joiner on and against the table saw). You do not need to worry about having the top of wood smooth as the planer will take care of that.

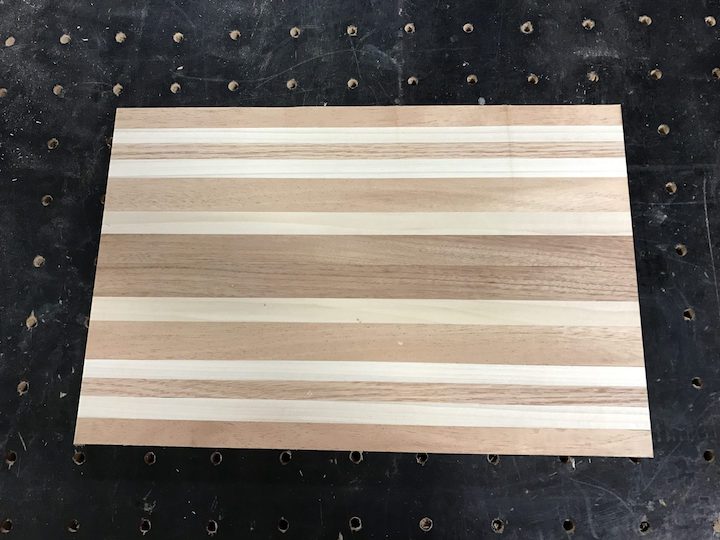
- Once you have three sides of however many strips of wood you are using, it's time to glue. The beauty of a homemade cutting board using different strips of wood is every single one will be different. Before actually gluing together, put all the strips of wood together and clamp down to make sure there are no gaps. If there are, then put back through jointer to make sure it's smooth and even against the next strip of wood. Spread the glue evenly across the strips of wood and clamp down. Make sure it doesn't bow as you clamp down. There will be some excess glue that you simply just wipe off with a wet towel. To be safe you should leave clamped for 24 hours.
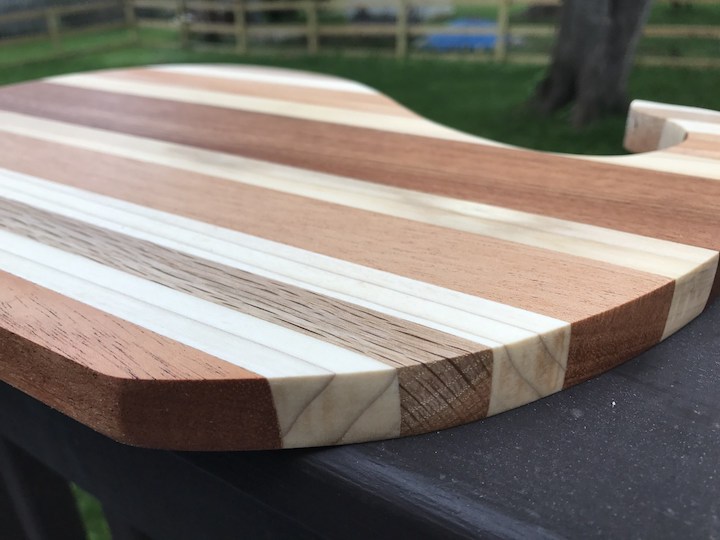
- When the cutting board has been unclamped it's time for the planer. A planer cuts wood into the desired thickness, while creating perfectly parallel surfaces. So basically it's perfect for a cutting board. Keep running through the planer until you have your desired thickness and both surfaces are smooth. You do not want to sand down too much otherwise it will bow overtime when getting wet. It's optimal to leave at least .75 inches thick.

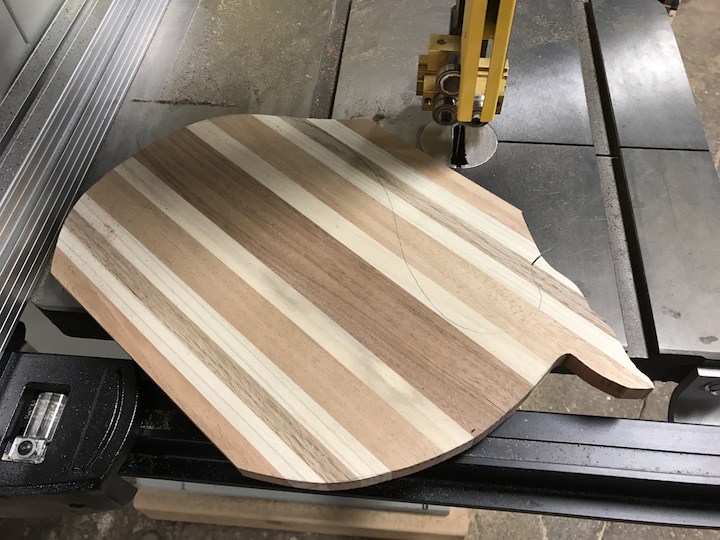
- Use a whale image and print it to the size to match the cutting board. Now you just tape the whale image onto the cutting board and trace the image. Then cut along the lines with the bandsaw. You'll want to go slow as there are curves throughout. It's starting to look like a whale.
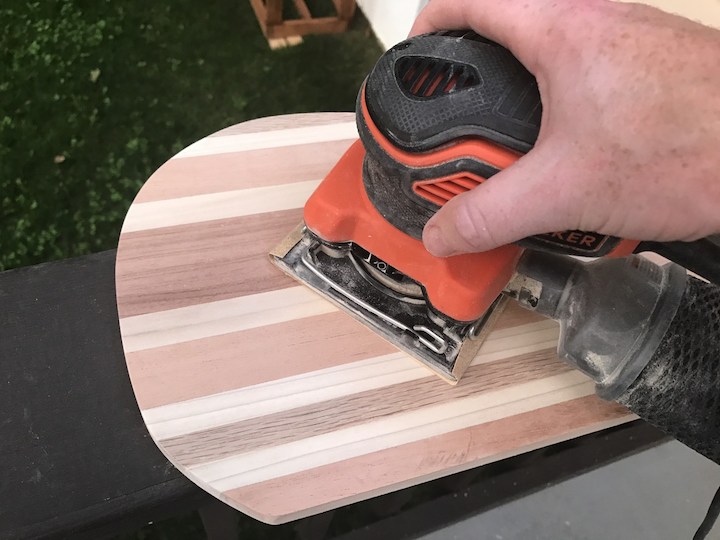
- All that's left is sanding. Since you want a smooth service you have to sand quite a bit. The trick is to use a pencil and draw some lines across the cutting board. Now pick up your hand sander with 80 grit sandpaper and go back and forth using different motions (circular, horizontal, vertical) until you don't see the pencil marks. Repeat with 150 grit sandpaper and 220 grit sandpaper. Don't forget the sides as well.
- You might think you're done but the first time you run your wood under water it will become rough again. To avoid this issue, wipe the wood with a wet towel and it will raise the grain. At this point you just need to repeat the sanding steps above and start with 80 grit sandpaper.
- With the cutting board officially complete, now it's time to make it shine and protect it. Wipe with some cutting board oil and what was already a great looking cutting board becomes gorgeous! At this point it is ready to use! Now you officially have a useable cutting board! To keep the life of the cutting board up, make sure to put the oil on it daily for the first week, then once a week for a few weeks, then once a month.


Notes
- When making a homemade cutting board, you want to use hardwood as it can take the abuse of the knife since you are actually cutting on it. The main types of hardwood used for cutting boards are oak, walnut, maple and cherry with maple probably being the most popular.
- Don't worry about going overboard on the glue. You will sand it off if it leaks out.
- Let the glue set for at least 24 hours before going through the planer.
- Don't skip spraying the cutting board with some water after the first sanding to make sure the grain rises to sand again.
Recommended Products
As an Amazon Associate and member of other affiliate programs, I earn from qualifying purchases.

Leave a Reply