
This post may contain affiliate links. Please read my disclosure.
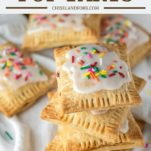
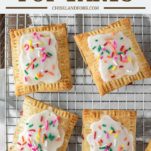
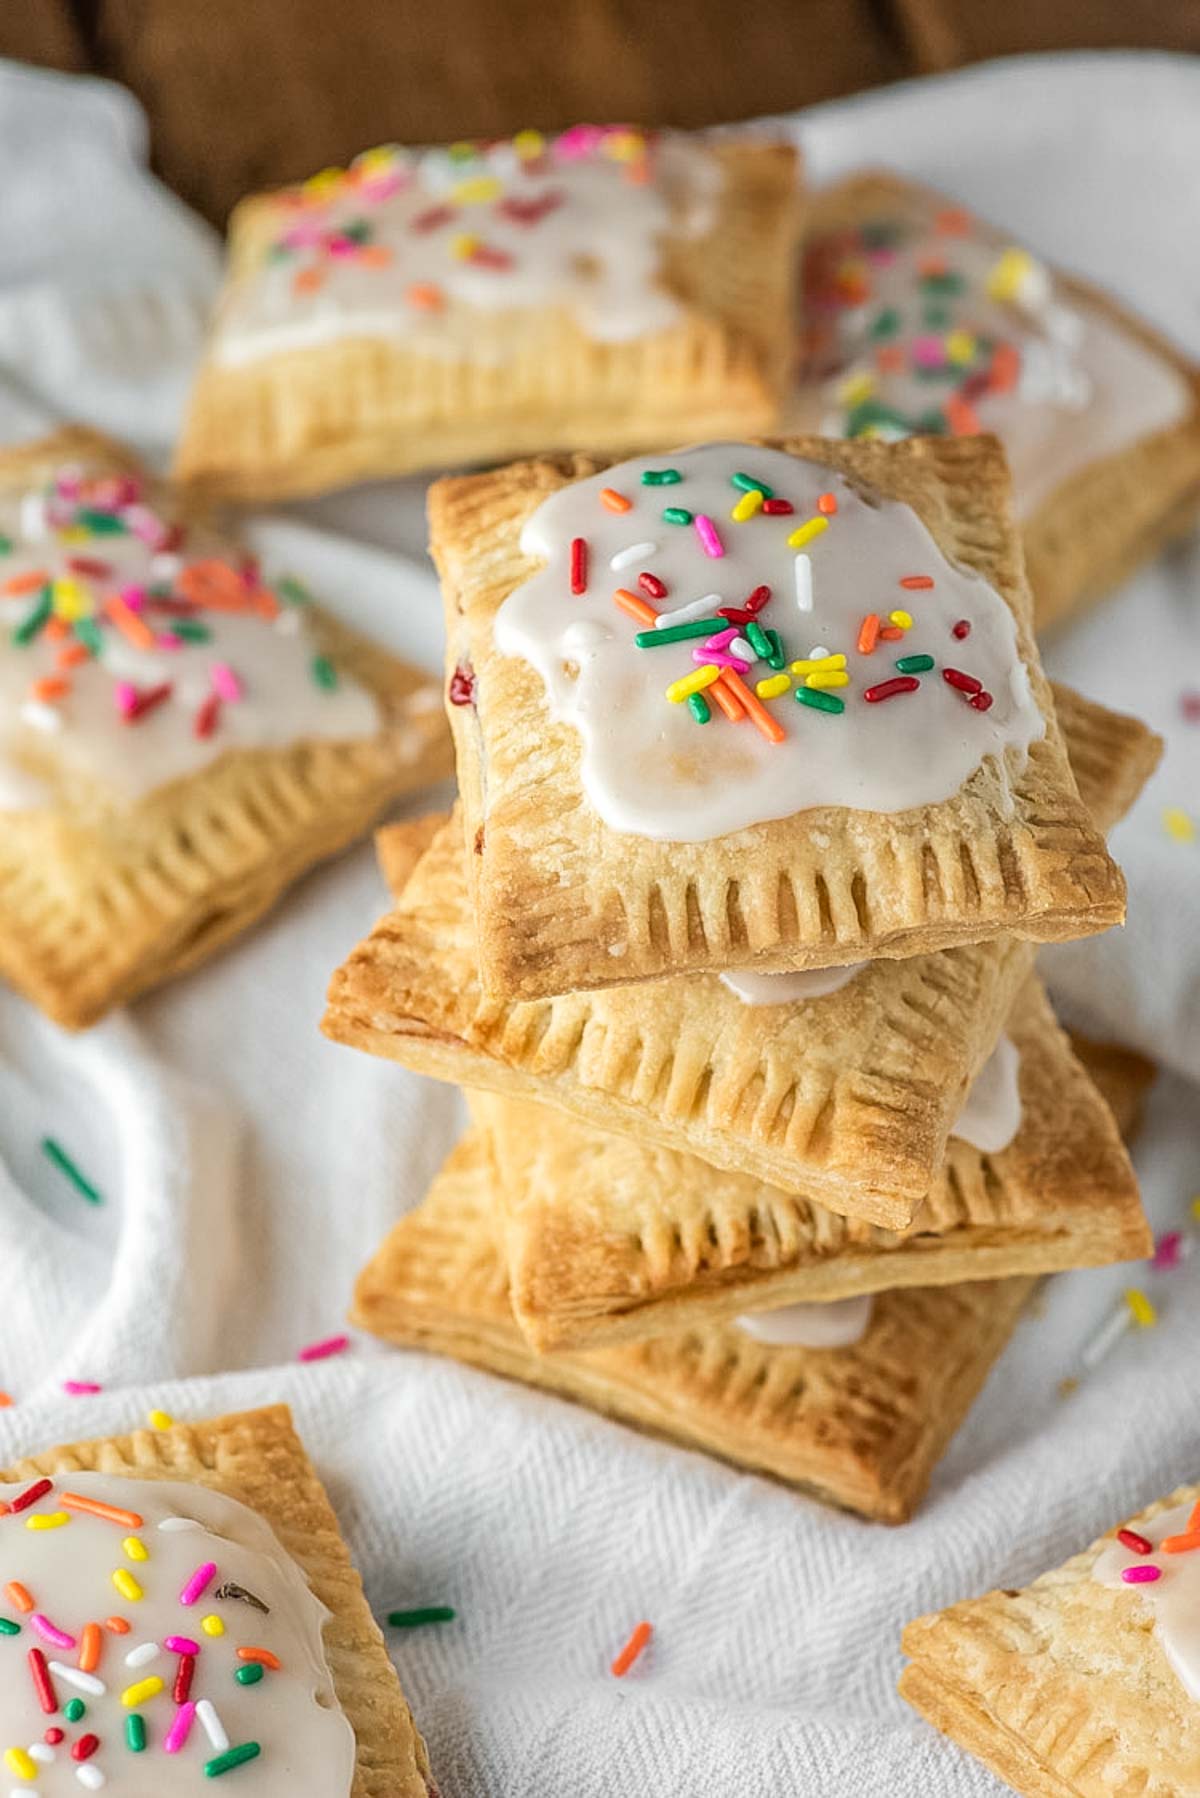
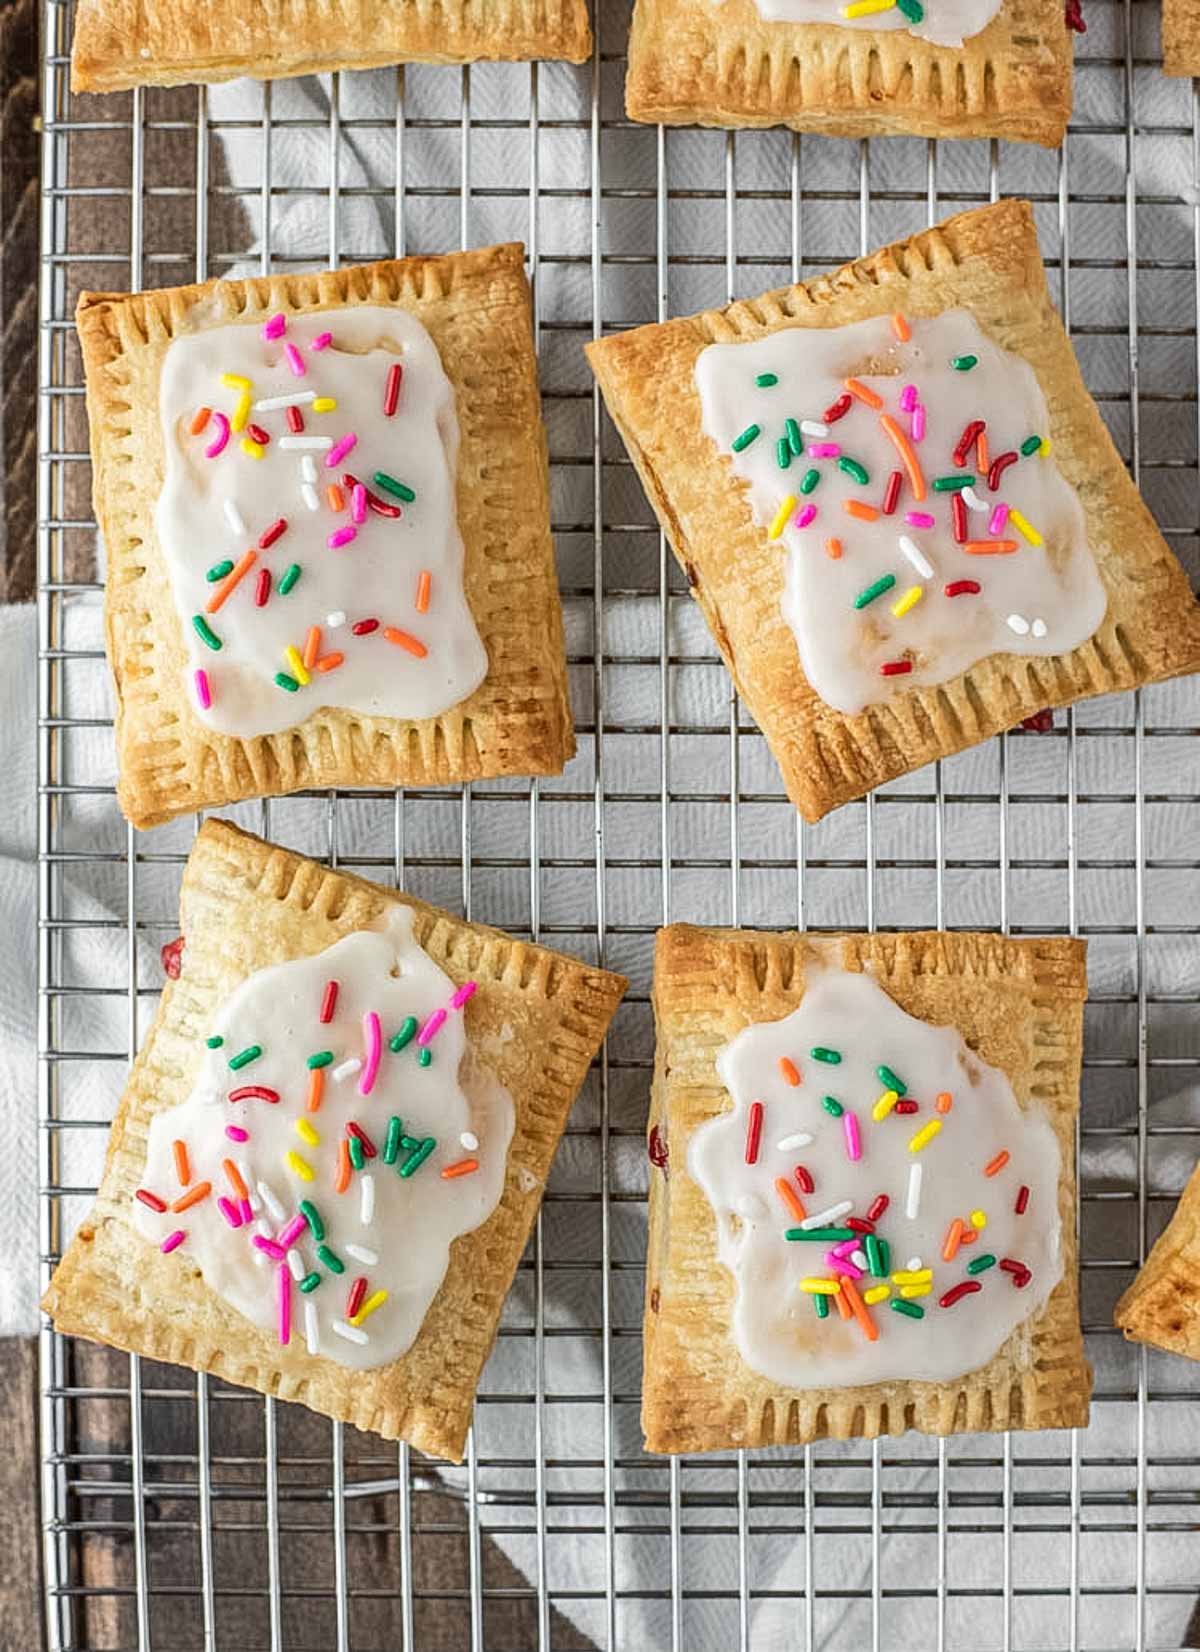
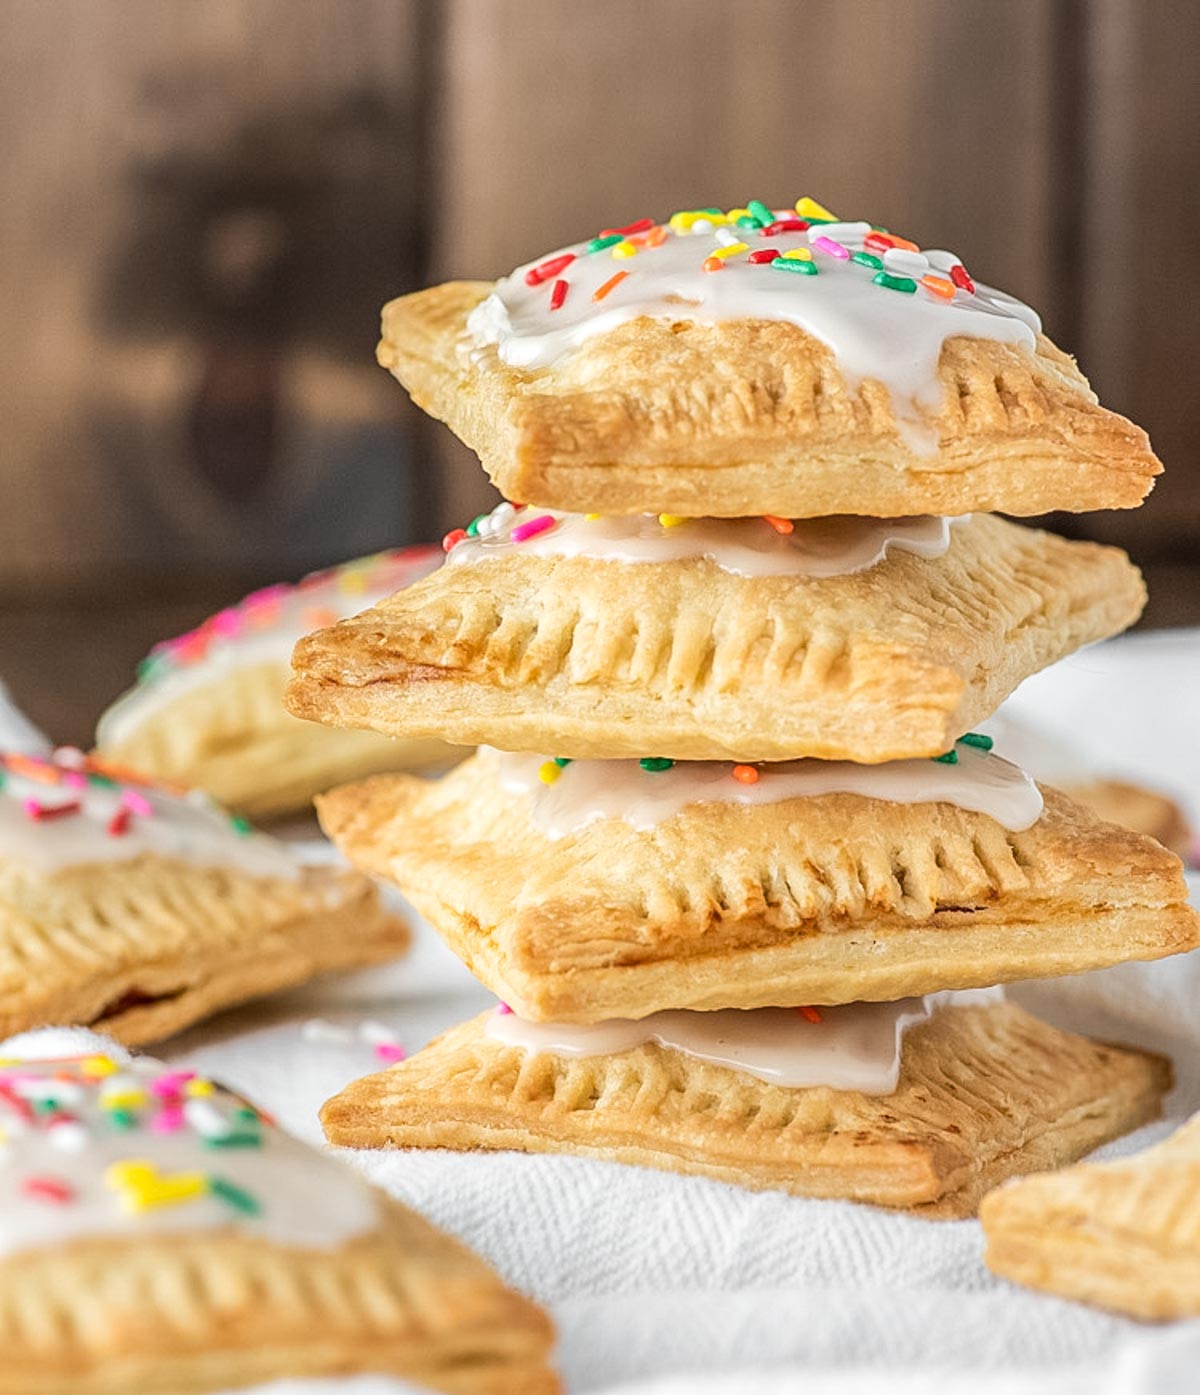
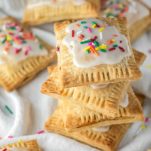
These homemade strawberry pop tarts are made with an easy and flaky pastry crust, filled with strawberry jam and topped with vanilla icing. If you grew up on Pop-Tarts, then these will bring back those childhood memories.
There is something about making a dish at home that you can buy at the store or a restaurant - from chocolate frosted donuts to homemade bagels. It just tastes better.
Growing up, I ate quite a few Pop-Tarts. My go-to was always frosted strawberry pop tarts. Yes I know they weren't the best things for you, but I mean what's better than something that you can just pull out of a package and throw in the toaster. Or even eat cold if you don't have time for the toaster.
Now enter these homemade pop tarts. Make no mistake, they take longer than just throwing something in the toaster but the extra effort is so worth it in the end.
The key to a good pop tart is the crust and this pop tart crust can be done either by hand or in a food processor. It's flaky and buttery and pieces will break off when you bite into it, just like a good old fashioned Pop-Tart.
Really the biggest difference is you can't throw these in the toaster after putting the frosting on. The frosting will just melt right off. To be honest, I'm not sure how Kellogg's was able to get the frosting to not just melt. Must be packed with preservatives or something.
What's really great about these homemade pop tarts though is you really can make whatever you like. The most work is the pop tart crust so the filling is easy comparatively. A frosting isn't necessary but to me makes all the difference. However you can eat them "naked" no problem.
Either way after having these homemade strawberry pop tarts, you'll never buy from the store again. And if you're feeling like another flavor, try these apple cinnamon pop tarts.
Jump to:
Recipe Ingredients
- Strawberry jam - homemade or store-bought.
- All-purpose flour - the base for the pastry crust.
- Salt - enhances the flavor of the crust.
- Unsalted butter - creates that flakiness you expect.
- Vodka - helps create a flaky crust.
- Egg - browns the pop tart.
- Powdered sugar - sweetens the icing.
- Milk - thins out the icing.
- Vanilla extract - adds the vanilla flavor for the icing.
How to Make Strawberry Filling
- Add the strawberries, sugar, cornstarch and lemon juice to a medium saucepan and heat over medium-low heat. Stir frequently until the strawberries release their juices.
- Start crushing the strawberries until mostly liquid and bring to a boil. Stir constantly and boil for about 3 minutes before removing from heat.
- Add the vanilla extract, cinnamon and a pinch of salt. Let cool and use when ready.

How to Make Homemade Pop Tarts
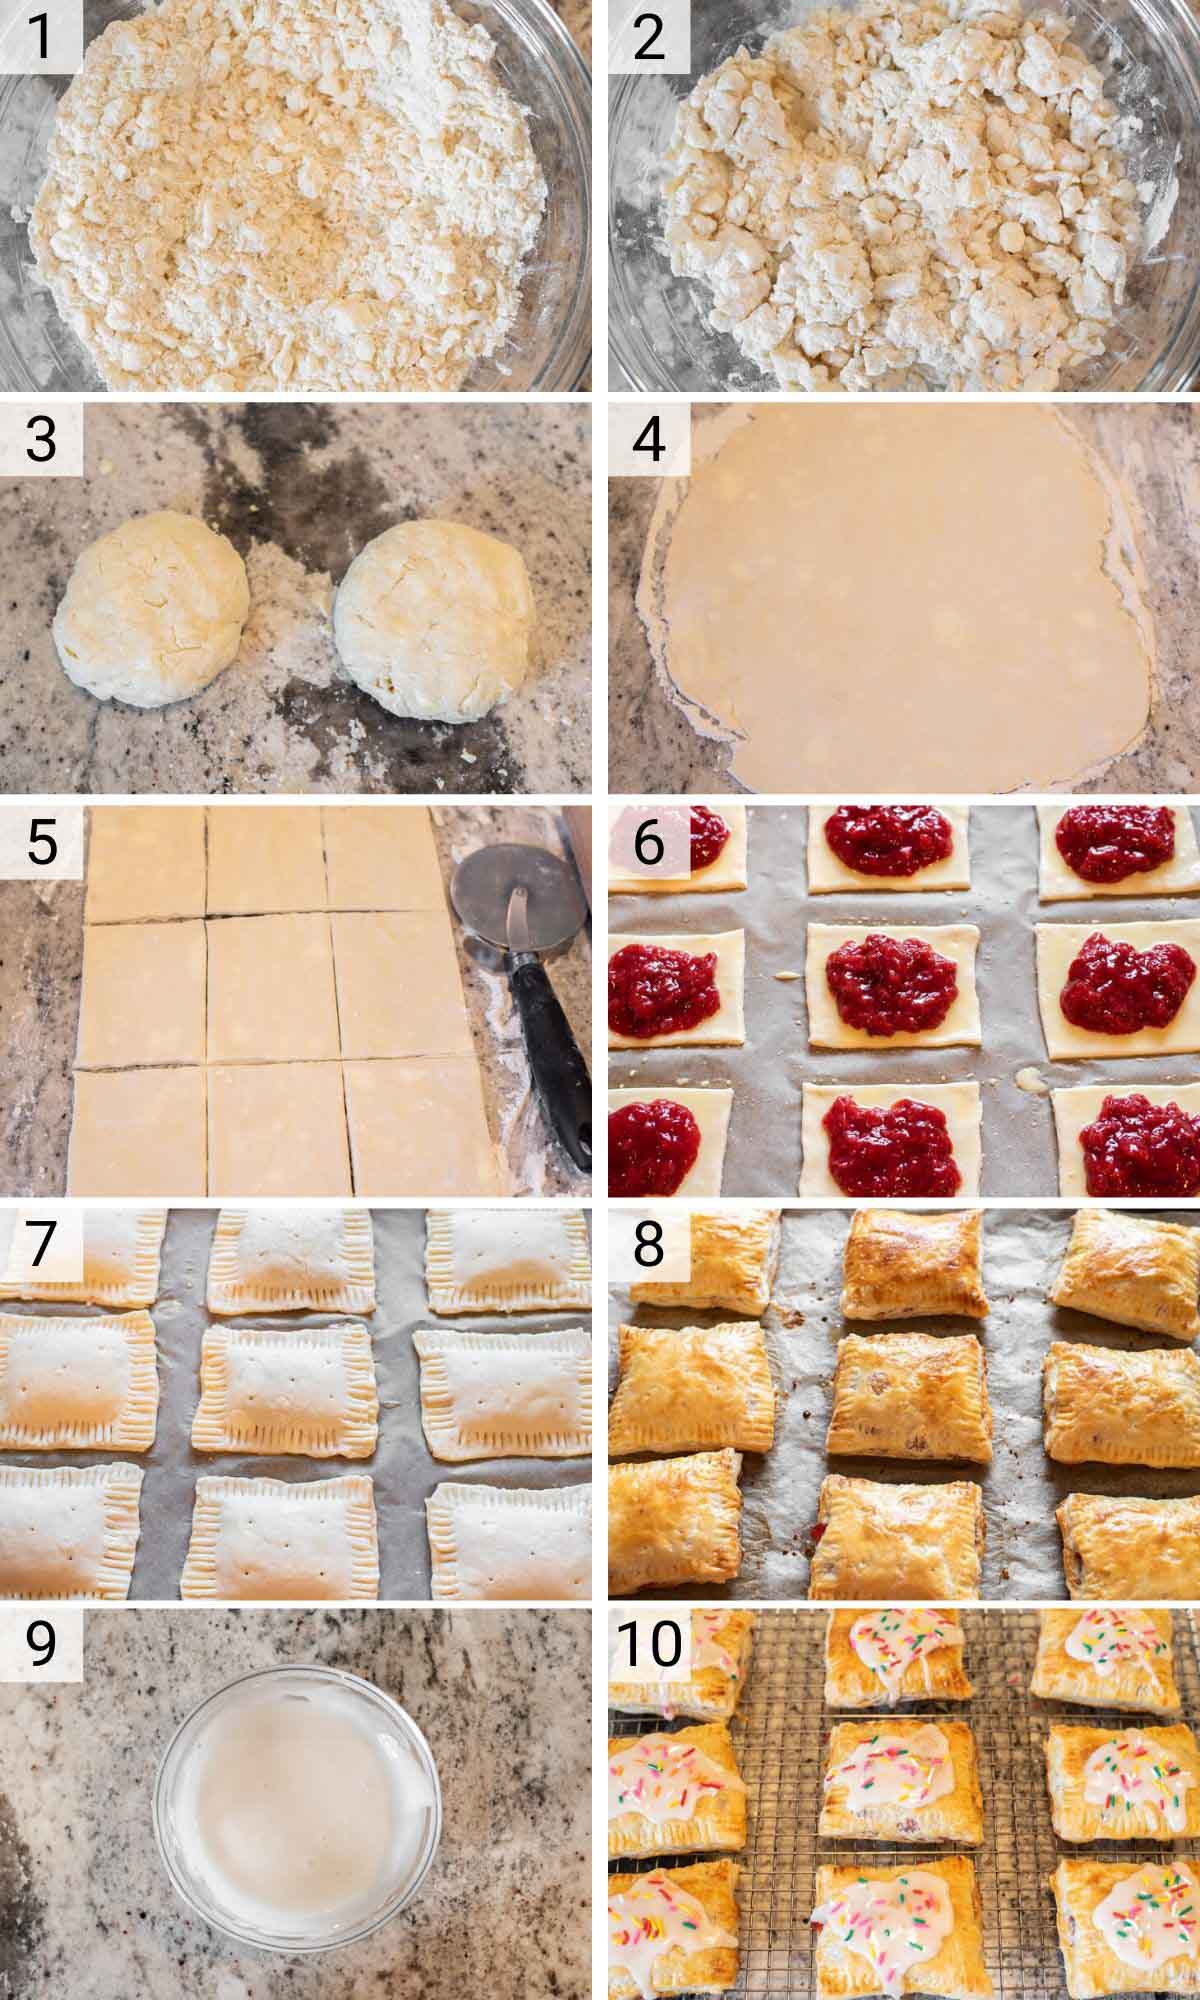
- Combine the dry ingredients in large bowl and add the butter, using a pastry cutter or fork to cut the butter until it resembles coarse meal.
- Add the water and vodka 1 tablespoon at a time. You want the dough to just clump together. Do not over mix it.
- Mold the dough into a ball and cut in half. Press each into a disk and cover with plastic wrap, refrigerating for 4 hours or overnight.
- Take out ½ the dough and roll the crust on a lightly floured surface to a 9x12" rectangle and ⅛" in thickness.
- Use a knife or pizza cutter to cut 3x4" pieces which gives you 9 rectangles. Transfer them to a parchment-lined baking sheet.
- Whisk together the egg and milk in a bowl and brush the egg was on each rectangle. Spoon a tablespoon of the jam into the center of each, leaving about ½" of space around the edges.
- Roll out the 2nd piece of dough to the same size and cut out 9 rectangles. Place each on top of the prepared dough with jam and press your fingers to seal them. Then use a fork to form edges. Poke some holes in the top and place the pop tarts in the fridge for 30 minutes.
- Bake the pop tarts for 25-30 minutes at 350°F or until golden browned. Let them cool for 5 minutes before transferring to a wire rack.
- Make the glaze by whisking all of the ingredients in a bowl until it reaches spreading consistency.
- Spread the glaze over each pop tart and top with sprinkles, if using.
The Key to Good Pastry Crust
So you might have seen this by now, but the key to good pastry crust that's super flaky is vodka. Why is that you may ask? Since vodka is alcohol, it actually burns off quickly in the oven which dries out the crust. It also does not contribute to the formation of gluten which is key to a good pie crust.
Food Processor Option
You don't have to use a fork or pasty cutter to make the dough. Using a food processor, pulse together the flour and salt until combined. Add butter and pulse until mixture becomes coarse meal, about 15 pulses.
Add the water/vodka mixture to food processor and pulse until it starts to clump together. DO NOT pulse until ball is formed. It should be crumbly with large clumps of dough. From there, complete the other steps.
FAQs
Yes. If you don't want to make the strawberry filling, store-bought strawberry jam works fine.
When it is golden brown and doesn't bounce back when you touch it, it is done.
Yes Let the homemade pop tarts cool completely before placing in a freezer bag for up to 3 months. When ready to eat, throw them in the oven at 350°F for 10 minutes or until heated through.
DO NOT throw in the toaster, as the icing will melt right off.
Pro Tips/Recipe Notes
- Speaking of the filling, I prefer to make it a day ahead of time to allow to cool and set.
- Place the pop tarts in the fridge for at least 30 minutes before baking to keep the butter cold and create a flaky pastry crust.
- Make sure you seal the pop tarts well with your finger or fork, or the filling will leak out.
- Do not skip poking the holes as it allows the steam to escape from the strawberry pop tarts.
Other Breakfast Recipes
- Prosciutto Quiche
- Chocolate Chip Scones
- Orange Rolls
- Egg and Cheese Hash Brown Waffles
- Blackberry French Toast Casserole
If you’ve tried these strawberry pop tarts or any other recipe on Chisel & Fork, please let me know how it turned out in the comments below! You can also follow me on Facebook, Instagram, Pinterest and YouTube to see more tasty meals and anything else I'm up to.
Strawberry Pop Tarts
Ingredients
Strawberry Filling
- 2 cups strawberries, stems removed and quartered
- 5 tablespoon granulated sugar, honey or maple syrup
- 2 teaspoon cornstarch
- ½ lemon, juiced
- ½ teaspoon vanilla extract
- ⅛ teaspoon cinnamon
- pinch of sea salt
Pop Tart Crust
- 2 ½ cups all-purpose flour
- ¾ teaspoon salt
- 1 cup unsalted butter, chilled and diced
- ¼ cup ice water
- ¼ cup cold vodka
Egg Wash
- 1 egg
- 2 teaspoon milk or water
Vanilla Icing
- ¾ cup powdered sugar
- 1 tablespoon milk, plus more as needed
- ½ teaspoon vanilla extract
- sprinkles if desired
Instructions
Strawberry Filling
- In a medium saucepan, combine the strawberries, sugar, cornstarch and lemon juice over medium-low heat. Stir frequently until the strawberries release their juices.
- Crush the strawberries until mostly liquid and then bring to boil, stirring constantly. Boil for 3 minutes and remove from heat. Stir in vanilla extract, cinnamon and a pinch of salt. Let cool and use when ready.
Pop Tart Crust
- In a large bowl, combine the flour and salt. Add the butter and use a pastry cutter or fork to cut them until the mixture resembles coarse meal. Add the water and vodka 1 tablespoon at a time, until the dough begins to clump together. Don't overmix. You may not need all of the water/vodka.
- Gently mold the dough into a ball. Cut in half and then press each into a flat disk. Cover with plastic wrap and refrigerate for 4 hours or overnight.
- Once ready, lightly flour a clean surface. Take out ½ the dough and roll the crust down to ⅛" thick and 9x12" in size. Cut into 3x4" pieces so you'll end up with 9 rectangles. Using a spatula, transfer the rectangles to a parchment-lined baking sheet.
- In a small bowl, whisk together the egg and milk. Brush the egg wash on each of the rectangles. Spoon a heaping tablespoon of filling into the center of each rectangle, leaving ½" of space around the edge.
- Take out the second piece of dough and roll out to the same size as the first. One at a time, place a second rectangle on top of the 9 assembled ones. Use your fingers to press around the seems and then use a fork to form the edges. Poke holes in the tops of each filled pastry to allow steam to escape.
- Place the pop tarts in the fridge for 30 minutes.
- Preheat oven to 350°F. Bake the pop tarts for 25-30 minutes or until lightly browned, rotating halfway through. Let the pop tarts cool on the pan for 5 minutes before transferring to a wire rack to cool completely before glazing.
Icing
- Whisk all of the ingredients in a medium bowl until it reaches spreading consistency. You want a thick glaze that is easy enough to spread. Spread over the top of each pop tart and decorate with sprinkles, if using. Allow to cool for 15 minutes so the frosting can set.
Notes
- If you don't want to make the strawberry filling, store-bought strawberry jam works fine.
- Speaking of the filling, I prefer to make it a day ahead of time to allow to cool and set.
- Place the pop tarts in the fridge for at least 30 minutes before baking to keep the butter cold and create a flaky pastry crust.
- Make sure you seal the pop tarts well with your finger or fork, or the filling will leak out.
- Do not skip poking the holes as it allows the steam to escape.
J says
Do you refrigerate or are they counter safe to store?
Ryan says
They can be store at room temperature for up to 5 days.
victoria says
do I have to use the vodka?
Ryan says
No just replace with water.