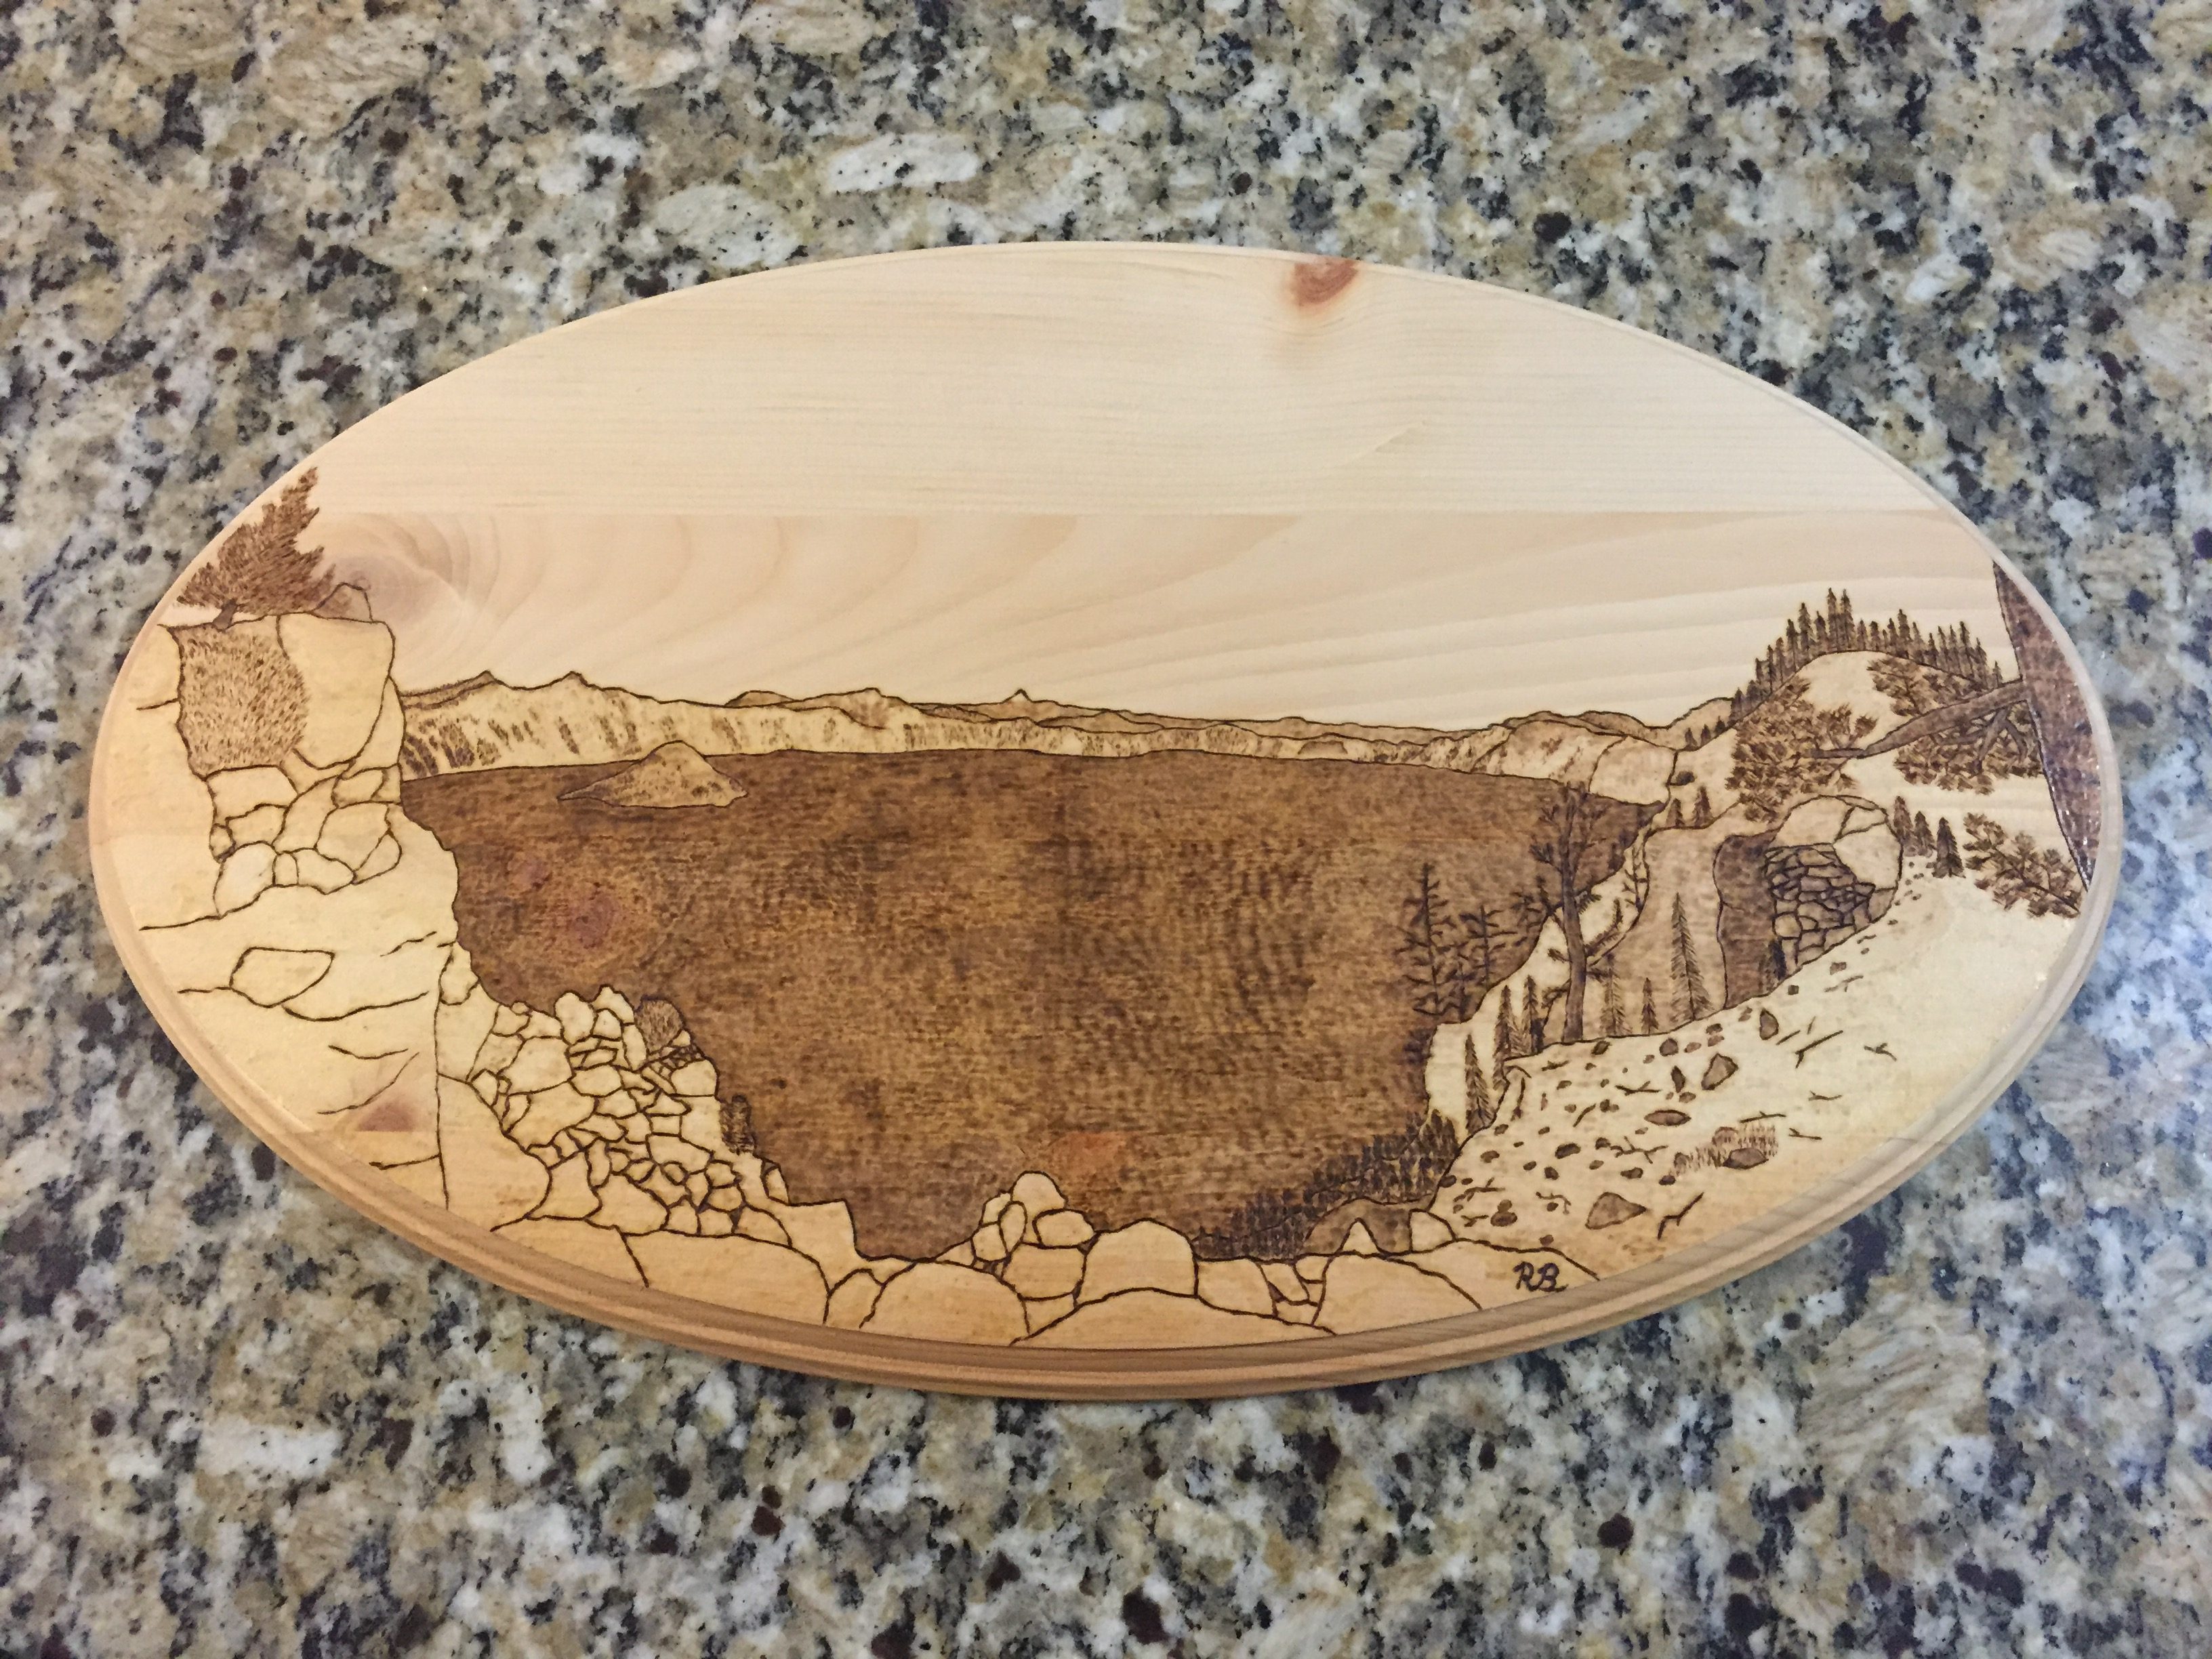
For anyone that loves the outdoors, Crater Lake should be on your Bucket List! Luckily for Lauren and I, we were able to cross it off our list 3 years ago. I'll be honest that I had never even heard of Crater Lake before I moved to Oregon, and I bet I'm not the only one out there. For those that don't know, Crater Lake is part of the Cascade Mountain range and is a former volcano that erupted. It eventually filled with water to form what you see today. The beauty of it inspired me to do some pyrography art so I could always remember it.
When I was working for GolfNow, I had to drive around the entire state of Oregon, which is much bigger than you might think. I honestly didn't mind though as the state has some of the most picturesque areas I've ever been to. As soon as I heard about Crater Lake, I knew I had to make a trip there. So on the week of July 4th, I purposely scheduled some meetings with golf courses that were semi-close.
Lauren and I made the trek down (about 6 hour drive) and I did some work for a couple of days while she studied for her boards. Then on the 3rd we drove up as earlier as possible to make sure we could get a campsite that night. We had to worry for a little bit as there weren't many campsites open but were able to get a spot. The rest of the day we did multiple hikes to see all of the different views possible. To this day, Lauren and I both say it was the most gorgeous spot we've ever been to.
So to have this story come full circle, when I got into wood burning, I knew immediately that I had to do something with Crater Lake to commemorate our experience. As I had mentioned in the past, I am decent at looking at pictures and drawing it myself (see pic below). So for Lauren's birthday a year and a half ago, I made her the Crater Lake pyrography art you see above and it still hangs in our house today! If you're looking for other DIY projects, check out my other projects I've shared over the years.

Shopping List
- Small piece of wood that you can find at Michael's
Tools
- Pyrography pen
- Carbon paper
- Pencil
Step 1:
Draw the image you want.
Step 2:
Place a piece of carbon paper on top of the wood. Tape it down to make sure it doesn't move.
Step 3:
Place your original drawing on top of the carbon paper and trace over it. The carbon paper will then transfer what your drawing into the wood.
Step 4:
Remove the drawing and the carbon paper.
Step 5:
Use your pyrography pen to go over what you drew on the wood. Be careful not to press too hard or have the pen in one spot too long, otherwise it will leave a deep burn. I'd practice on a spare piece of wood ahead of time to get down how hard to press down and how you can shade areas.
Hope you give it a try!



Sylvia Duer says
Ryan, your artwork is absolutely beautiful! I still have some of your drawings you did for me when you were a little boy. They were alsorquite good. I am saving them for you.