This post may contain affiliate links. Please read my disclosure.
A flaky, melt-in-your mouth golden crust filled with dark chocolate make these homemade chocolate croissants one of my favorite breakfast recipes.
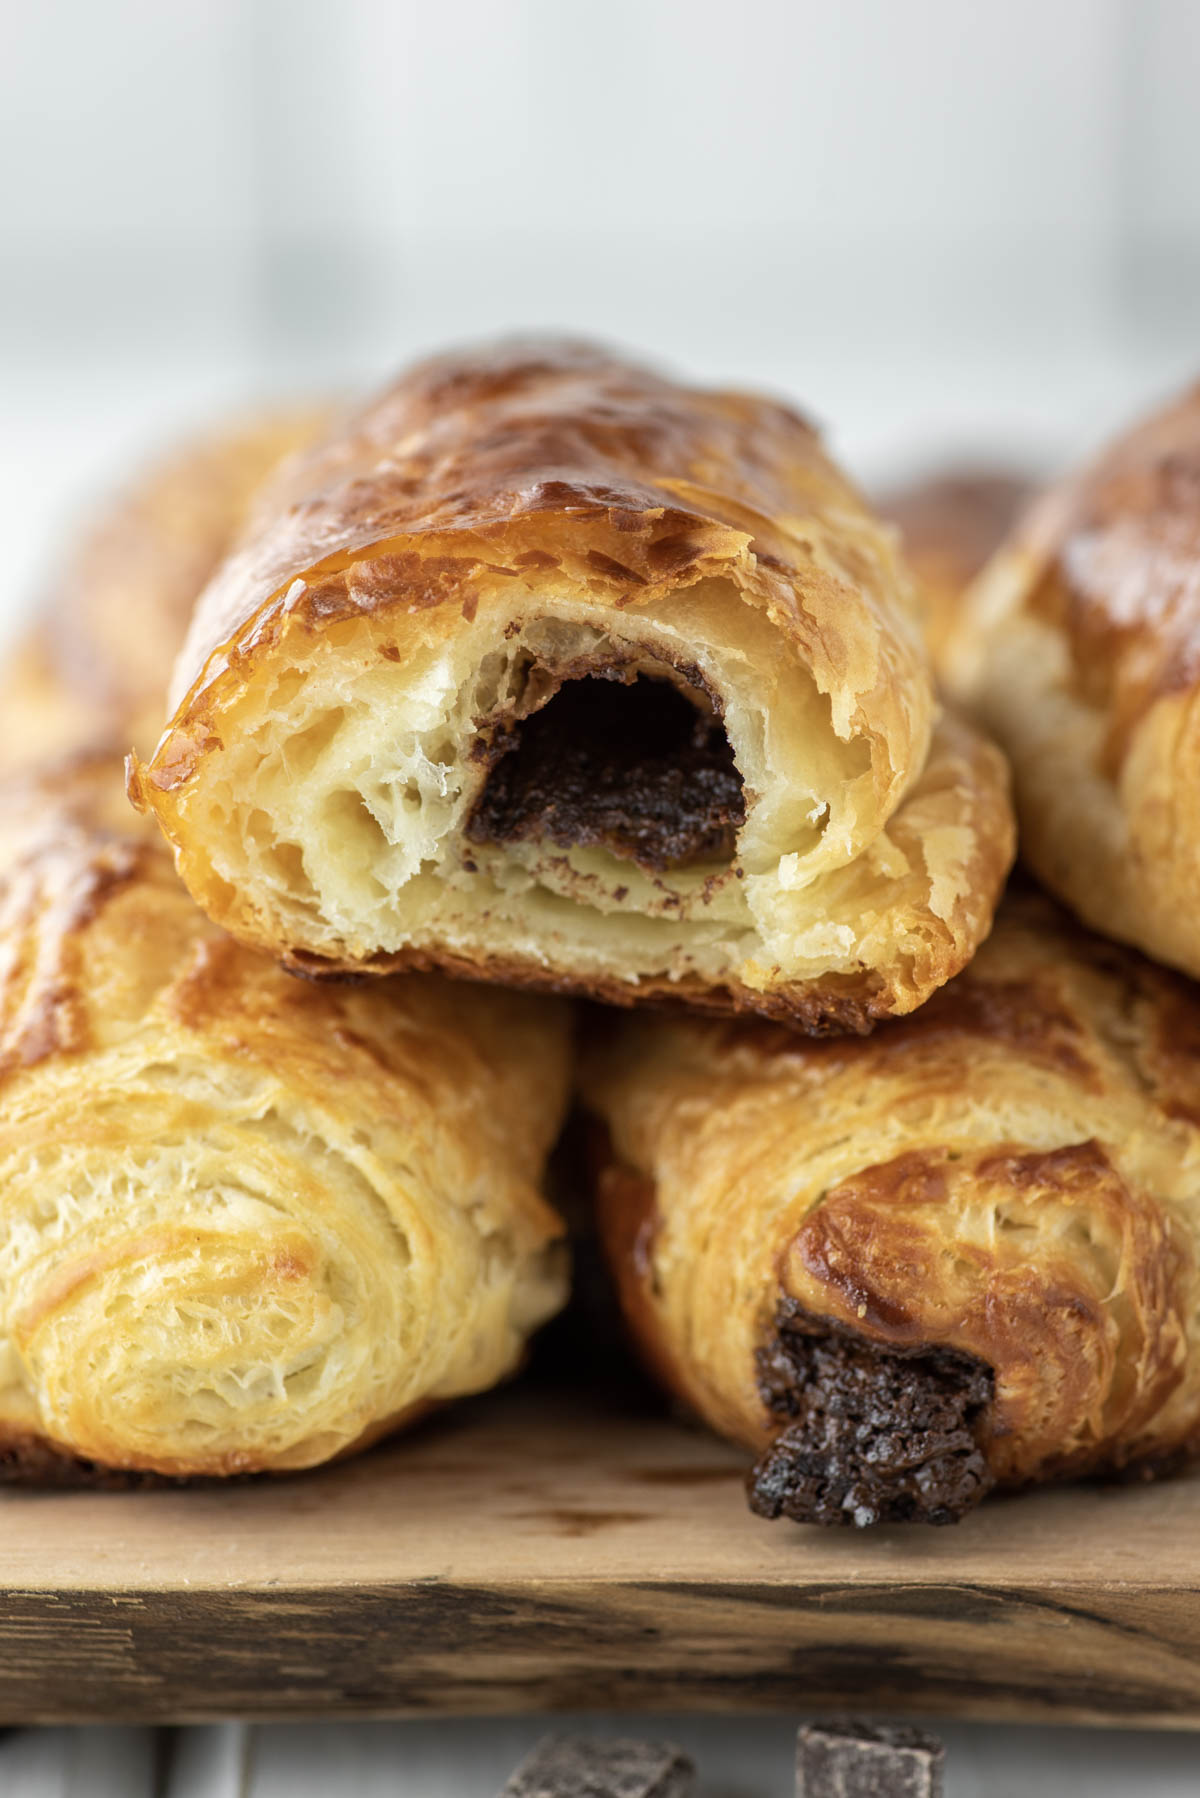
I love tackling homemade bread/pastry for breakfast that someone doesn't normally think to make and would just rather buy - from homemade bagels to flaky buttermilk biscuits.
And these chocolate croissants were my next challenge. I'm not going to lie. I was a little scared to make homemade croissants, but my nervousness was unfounded.
Yes it takes some time to make, but most of that involves letting the dough/butter get cold so you can create that flaky crust you expect from a croissant.
The dough itself is surprisingly simple and comes together in about 5 minutes. You can either use a stand mixer or your hands to knead it together.
From there, it is just some time and love. And what you get at the end are 27 ultra thin layers, buttery crispness and melted chocolate? Is your mouth watering yet?
So instead of going to Panera or some local bakery, why don't you try your hand at these homemade chocolate croissants.
Jump to:
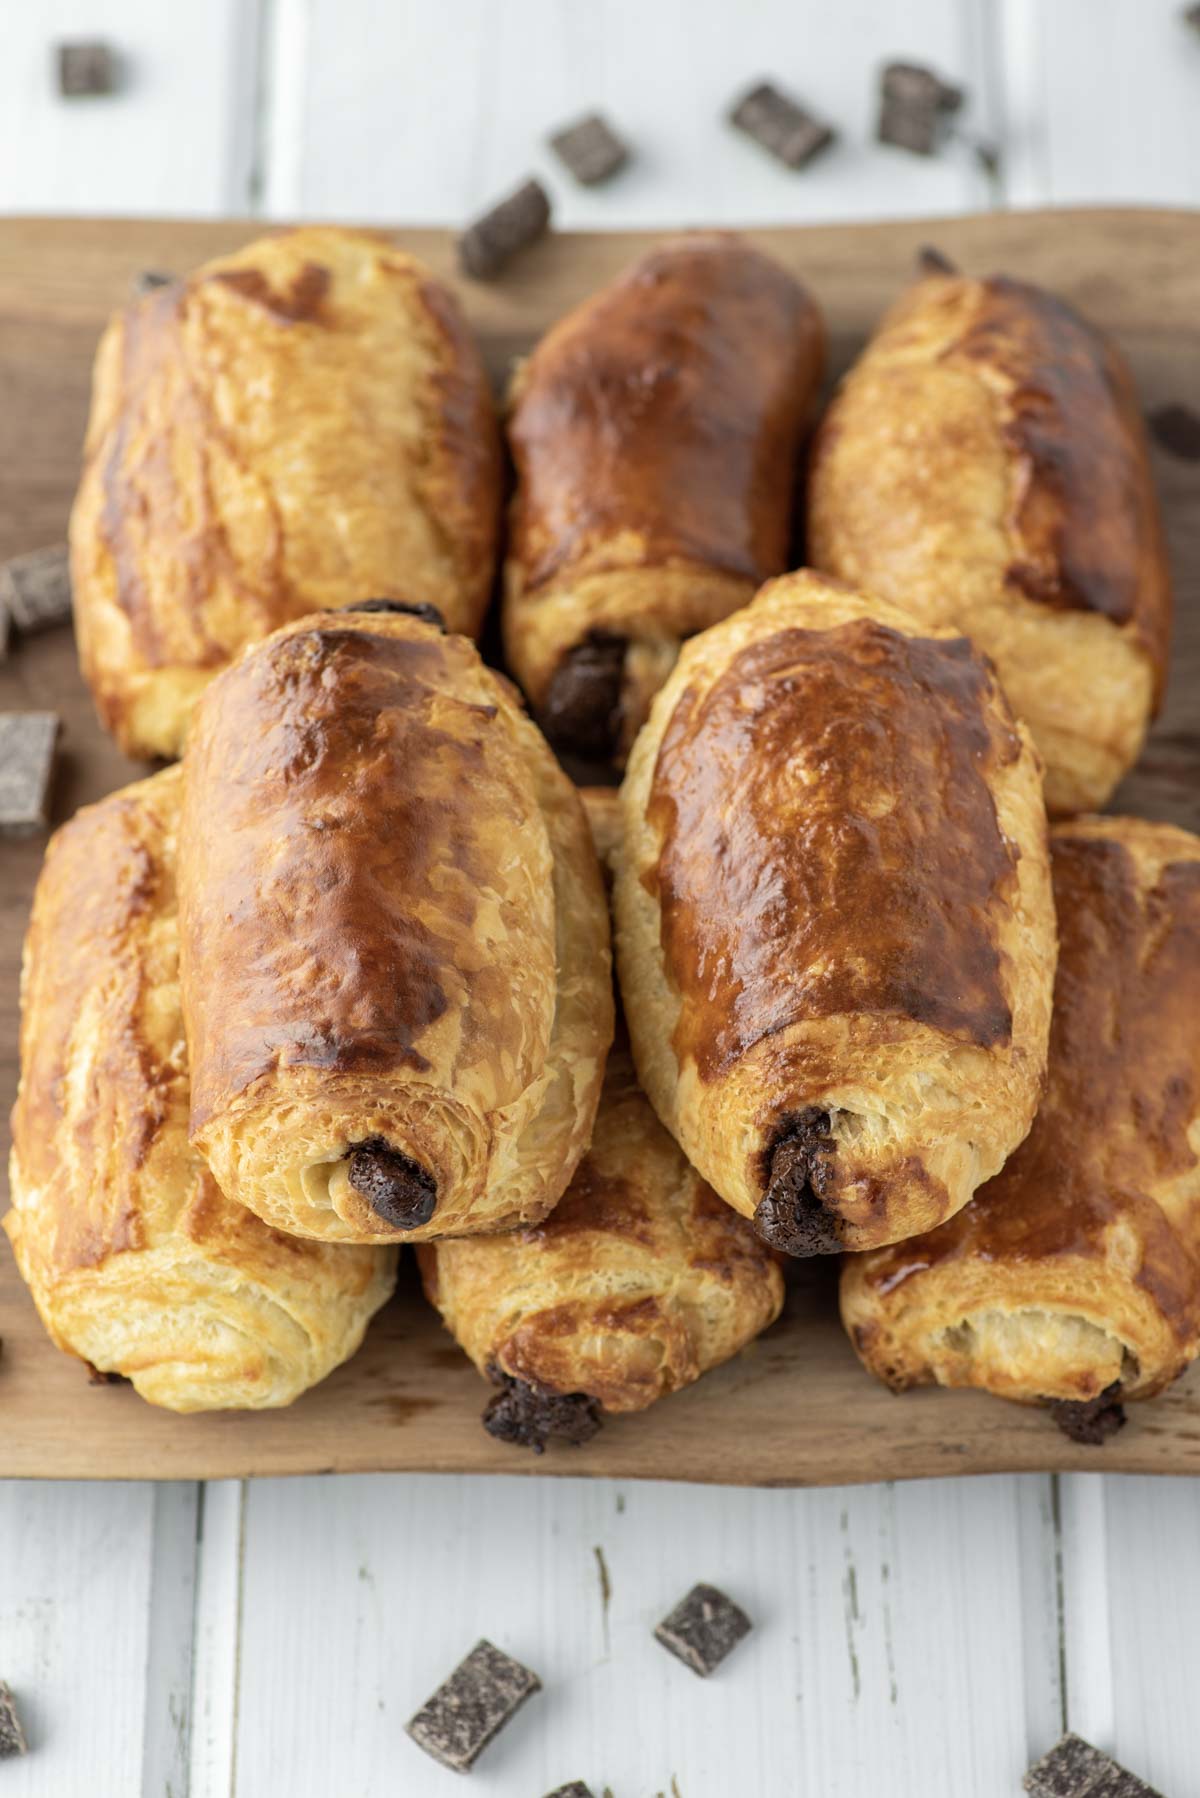
Recipe Ingredients
- Unsalted butter - creates the rise and flakiness you expect with croissants.
- All-purpose flour - has just the right amount of gluten.
- Granulated sugar - adds a slight sweetness to these homemade croissants.
- Active dry yeast - can also use instant yeast which helps give the dough its rise.
- Salt - enhances the flavor.
- Whole milk - creates the croissant dough consistency.
- Egg - acts as a leavening agent to help the chocolate croissants rise.
- Chocolate - use a quality dark chocolate for a rich flavor.
Step-by-Step Instructions
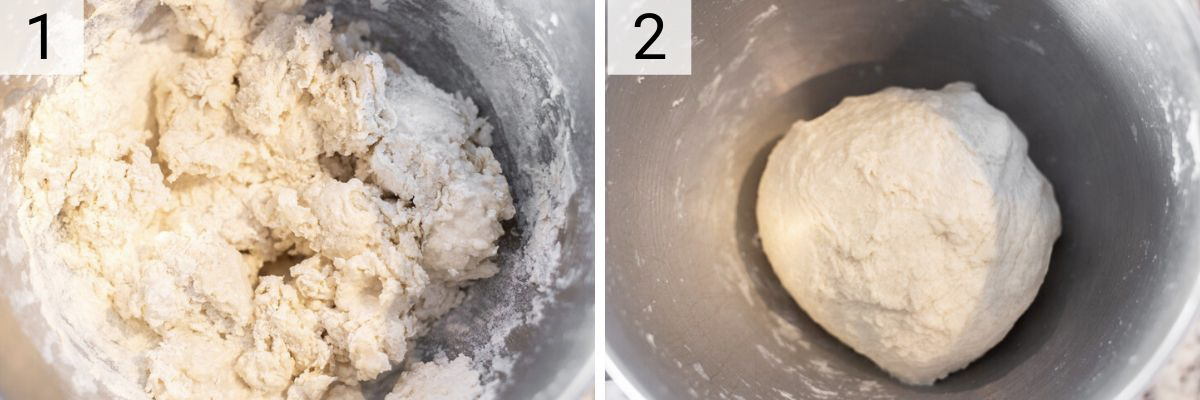
- Cut the butter in three (1 tbsp) slices and place in the bowl of an electric stand mixer fitted with the dough hook attachment. Add the flour, sugar, yeast and salt. Turn the mixer on low speed for one minute to combine the ingredients. With the mixer running, slowly pour in the milk. Once all the milk is added, turn the mixer to medium-high speed and knead for five minutes, or until it starts to pull away from the sides and if you press it with your finger, it will bounce back. You can also knead by hand for five minutes.
- Form into a ball and cover with plastic wrap and put in the refrigerator for one hour.
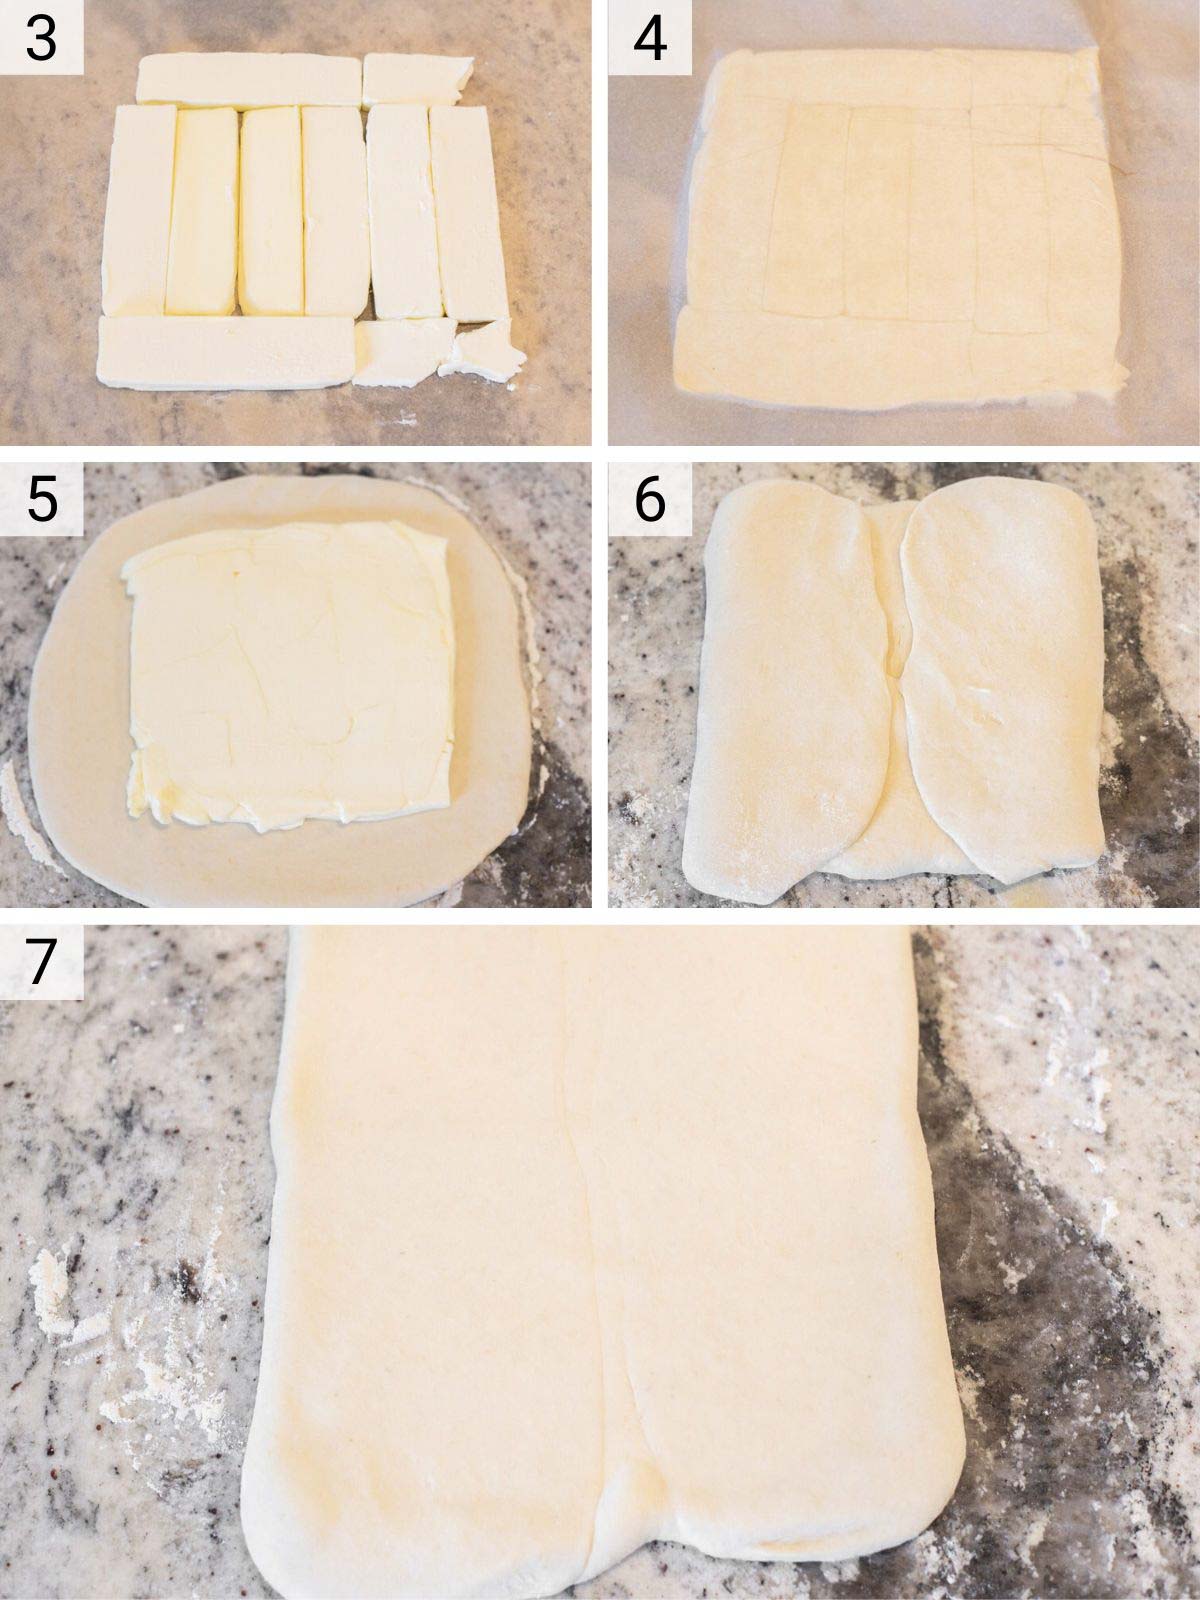
- Slice the butter in three even slices and place it onto a sheet of parchment paper.
- Place another piece of parchment on top of the butter, and beat it. Use the rolling pin to flatten the butter to a seven inch square that is about ½ inch thick. Transfer the butter to the refrigerator for 30 minutes.
- Take the dough out of the refrigerator and lightly flour the counter. Start flattening it out with your hands. You are rolling it into a square so using your hands to help shape helps. Roll it to a 10 inch square. Place the cold butter layer on top of the dough.
- Fold the sides of the dough over the butter, so it is completely enclosed.
- Roll to seal the seams, making sure to lengthen the dough, not widen it. You want it to be about 8×14 inches. Cover with plastic wrap and put in the fridge for one hour or freezer for 15 minutes.
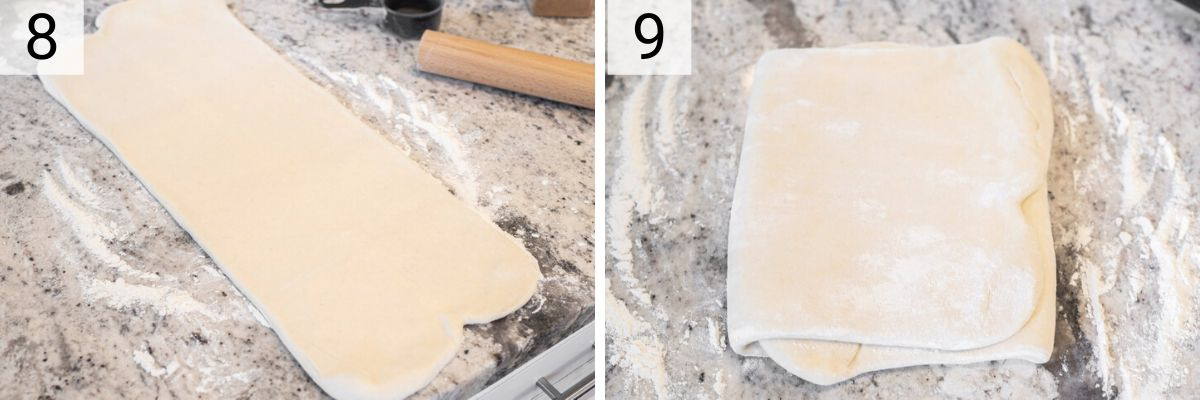
- Remove the dough from the fridge and roll out on a floured surface to an 8×24 inch rectangle.
- Fold the top half down to the middle and then fold the bottom half over the top and turn the dough clockwise to the left. This marks the first learn and creating three layers. Cover and refrigerate for one hour or freeze for 15 minutes. Repeat the process 2 more times to create 27 layers. Make sure the dough is refrigerated between each roll. Once you've done this 3 times, cover and refrigerate overnight.
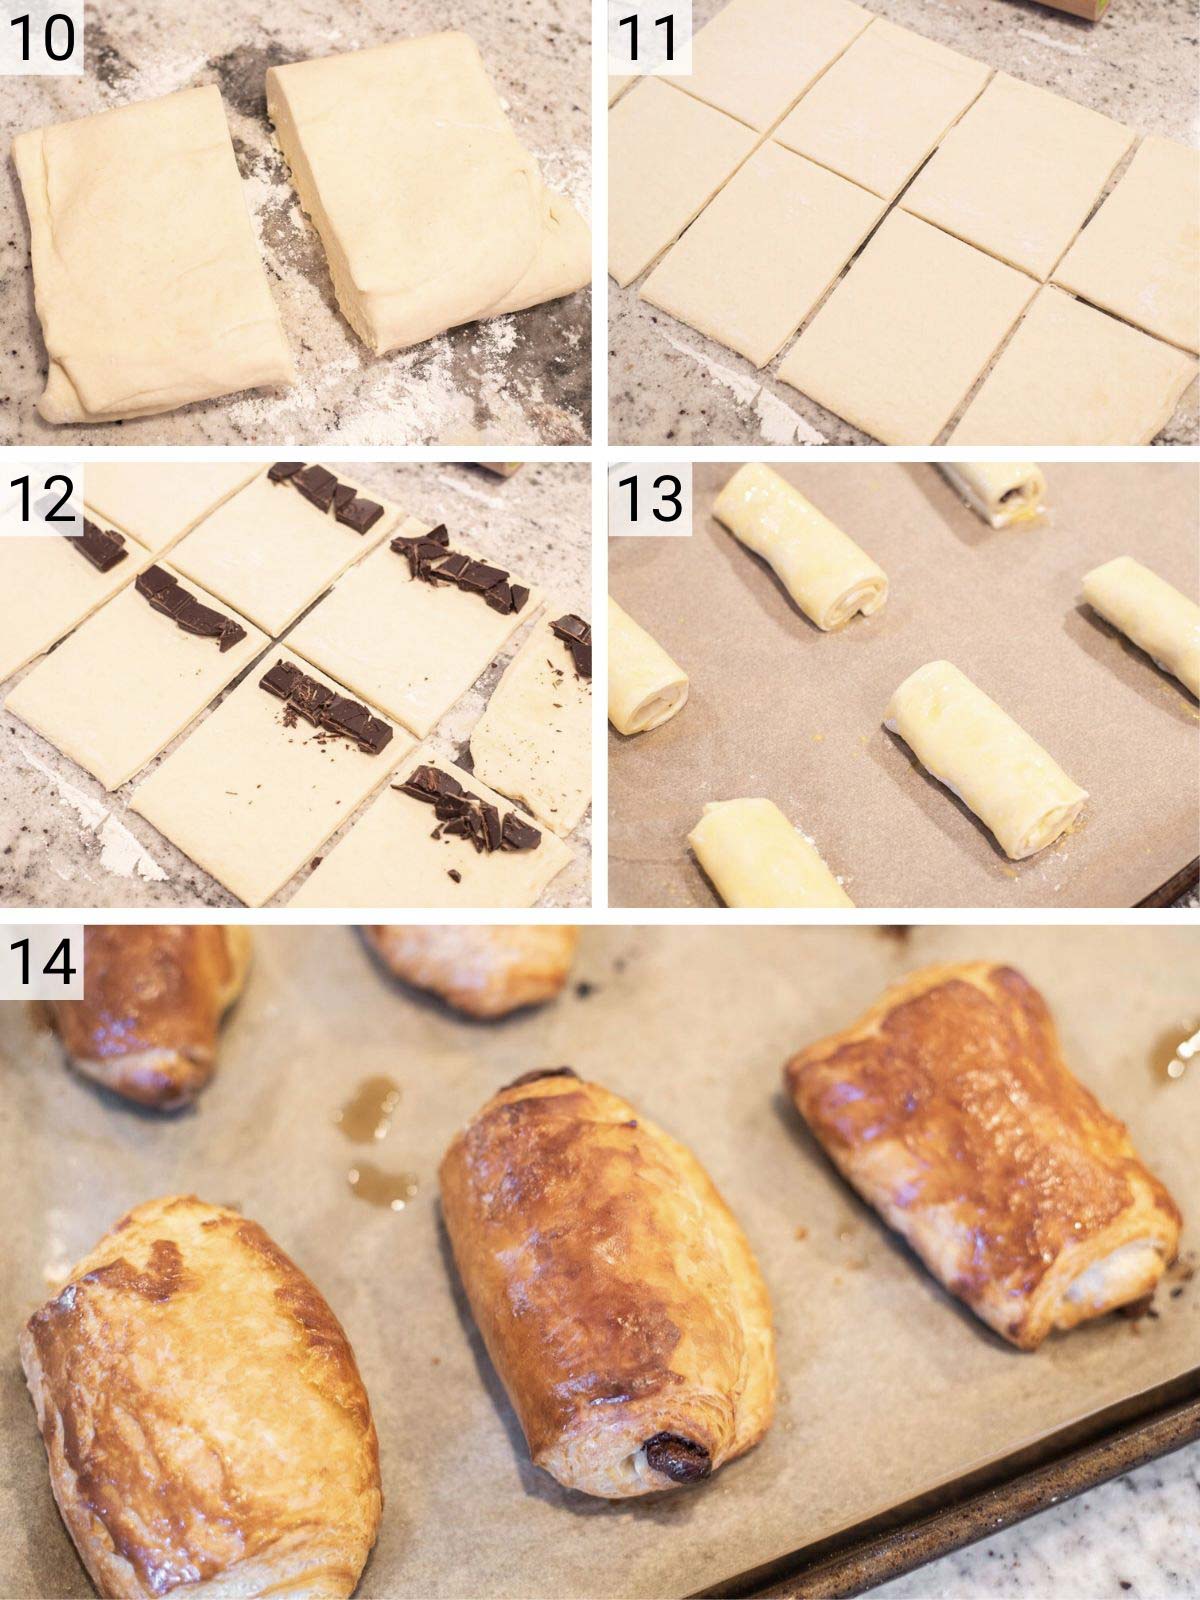
- To form the chocolate croissants, cut the dough in half and place one half in the refrigerator.
- On a floured surface, roll out the dough to a 10×16 inch rectangle. With a knife, trim the edges. Using a pizza cutter or sharp knife, slice in half vertically. Each skinny rectangle will be five inches wide. Then cut three even slices horizontally, yielding eight 5×4 inch rectangles.
- Place a few small pieces of chocolate on the edge of the dough and roll tightly so it is enclosed. Place the croissants, seam-side down, on a parchment-lined baking sheet. Repeat with the other half of dough.
- Brush the chocolate croissants with the beaten egg, saving the rest of the egg wash for later. Cover and place the croissants in a warm place to rise for 2 hours.
- Preheat oven to 400°F. Brush the proofed croissants with egg wash one more time. Bake for 20 minutes, or until golden browned, rotating halfway through. Remove from oven and transfer to a wire to cool slightly before serving.
Croissants Origin
Most people, including myself before writing about croissants, think they originated from France. This isn't actually true. Croissants were first created in Austria.
So why do we associate croissants with France? Well a French baker, Sylvain Claudius Goy, wrote a recipe back in 1915 that the world has come to know and love.
How to Store
Keep these chocolate croissants in an airtight container or tightly wrap in foil so they don't dry out. They will last for 2-3 days at room temperature or 1 week in the refrigerator.
How to Freeze
To freeze baked chocolate croissants, let them cool to room temperature and then place in an airtight container or freezer bag. You can freeze for 1-2 months. When ready to eat, let them sit at room temperature for 1 hour.
If you want to freeze unbaked chocolate croissants, make the dough up to creating the 27 layers. Then wrap tightly in plastic wrap and place in freezer bag. Freeze for 1-2 months.
When ready to bake, place the dough in the refrigerator the day before so it can thaw out. Proceed with rolling it out, cutting it and rolling up with chocolate before letting rise for 1 ½ hours and baking.
FAQs
Croissants are technically a type of pastry, not really a specific kind of bread. All pastry is bread, but not all bread is pastry. ... However by using yeast, which causes the dough of the croissant to rise so dramatically, it qualifies as a bread.
A traditional croissant is in the shape of a half moon. I mean it translates to crescent for a reason. However when it comes to chocolate croissants, I've always seen rectangle/square shapes and they are called Pain Au Chocolate. I imagine it is so you can easily roll up the chocolate.
Use a quality dark chocolate that you can cut up thin and roll the croissant dough up.
Pro Tips/Recipe Notes
- Make sure you use a quality yeast that isn't expired.
- The dough always needs to be cold, which is why you are constantly placing it in the fridge. If it warms up too much, just place back in the fridge for 20 minutes.
- You want flour on your work surface, your hands and the rolling pin so the dough doesn't stick.
- If you notice air bubbles in the chocolate croissants, just pop them and lightly flour where the bubbles were.

Other Breakfast Recipes
- Chocolate Chip Scones
- Chocolate Frosted Donuts
- Strawberry Pop Tarts
- Egg and Cheese Hash Brown Waffles
- Blueberry Scones
If you’ve tried these chocolate croissants or any other recipe on Chisel & Fork, please let me know how it turned out in the comments below! You can also follow me on Facebook, Instagram, Pinterest and YouTube to see more tasty meals and anything else I'm up to.
Chocolate Croissants
Ingredients
- 3 tablespoon unsalted butter
- 4 cups all-purpose flour (500g)
- ¼ cup granulated sugar
- 1 tablespoon active dry yeast
- 2 teaspoon salt
- 1 ¼ cup cold milk
- 1 ½ cups unsalted butter
- 1 large egg, beaten
- 2 (4 oz) chocolate bars
Instructions
- Cut the butter in three (1 tbsp) slices and place in the bowl of an electric stand mixer fitted with the dough hook attachment. Add the flour, sugar, yeast and salt. Turn the mixer on low speed for one minute to combine the ingredients. With the mixer running, slowly pour in the milk. Once all the milk is added, turn the mixer to medium-high speed and knead the dough for five minutes, or until the dough starts to pull away from the sides and if you press it with your finger, it will bounce back. You can also knead by hand for five minutes.
- Form the dough into a ball and cover with plastic wrap and place in the refrigerator for one hour.
- Slice the cold butter in thirds and place it onto a sheet of parchment paper. Place another piece of parchment on top of the butter, and beat it with a rolling pin. Use the rolling pin to roll the butter to a seven inch square that is about ½ inch thick. Transfer the butter to the fridge for 30 minutes.
- Take the dough out of the refrigerator and lightly flour the counter. Begin flattening out the dough with your hands. You are rolling it into a square so shaping with your hands helps. Use a rolling pin to roll it to a 10 inch square. Place the butter layer on top of the dough and fold the sides of the dough over the butter, so it is enclosed completely.
- Roll the dough to seal the seams, making sure to lengthen the dough, not widen it. You want it to be about 8x14 inches. Cover the dough with plastic wrap and place in the fridge for one hour or freezer for 15 minutes.
- Remove the dough from the fridge and roll out on a floured surface to an 8x24 inch rectangle.
- Fold the top half down to the middle and then fold the bottom half over the top and turn the dough clockwise to the left. This marks the first learn and creating three layers. Cover and refrigerate for one hour or freeze for 15 minutes.
- Remove the dough from the fridge and roll out to an 8x24 inch rectangle again. Repeat folding the top half to the middle and the bottom half over the top and turning clockwise. This marks the second turn and creating nine layers. Cover and refrigerate for one hour or freeze for 15 minutes.
- Remove the dough from the refrigerator and roll out to an 8x24 inch rectangle one last time. Repeat folding the top half to the middle and the bottom half over the top and turning clockwise. This marks the third turn and creating 27 layers. Cover and refrigerate overnight.
- To form the croissants, cut the dough in half and place one half in the fridge.
- On a floured surface, roll out the dough to a 10x16 inch rectangle. With a knife, trim the edges of the dough.
- Using a pizza cutter or sharp knife, slice the dough in half vertically. Each skinny rectangle will be five inches wide. Then cut three even slices horizontally, yielding eight 5×4 inch rectangles.
- Place a few small pieces of chocolate on the edge of the dough and roll tightly so it is enclosed in the dough. Place the croissants, seam-side down, on a parchment-lined baking sheet. Repeat with the other half of the dough.
- Brush the croissants with the beaten egg, saving the rest of the egg wash for later. Cover and place the croissants in a warm place to rise for 2 hours.
- Preheat oven to 400°F. Brush the proofed croissants with egg wash one more time. Bake for 20 minutes, or until golden browned, rotating halfway through. Remove from oven and transfer to a wire to cool slightly before serving.
Notes
- Make sure you use a quality yeast that isn't expired.
- The dough always needs to be cold, which is why you are constantly placing it in the refrigerator. If it warms up too much, just place back in the fridge for 20 minutes.
- You want flour on your work surface, your hands and the rolling pin so the dough doesn't stick.
- If you notice air bubbles just pop them and lightly flour where the bubbles were.
- Use a quality dark chocolate that you can cut up thin and roll the croissant dough up.




Dana Osborn says
This recipe is AMAZING!!! The 20 hours it took me was so worth it! Heads up for amateurs like myself, cook them in the top middle rack. If you can’t fit them on one rack, wait until the first batch is finished cooking otherwise the bottom middle rack will burn them. This happened to me, but I took them out, put another layer of egg wash on top and waited to until the first batch was completed. This seemed to work just fine for that second batch they were crispier on the bottom, but not 100% burnt. These croissants are absolutely delicious!
Ryan says
Glad you enjoyed them. They are definitely a labor of love. I'll add that note for future cooks!
Dana Osborn says
Definitely enjoyed them! Thank you for this recipe!
Vivian Pacheco says
This was my first time attempting croissants and this recipe was so amazing to follow. I’m surprised how amazing they came out. I will always rely on this recipe when making my chocolate croissants.
Ryan says
Glad you enjoyed it!