This post may contain affiliate links. Please read my disclosure.
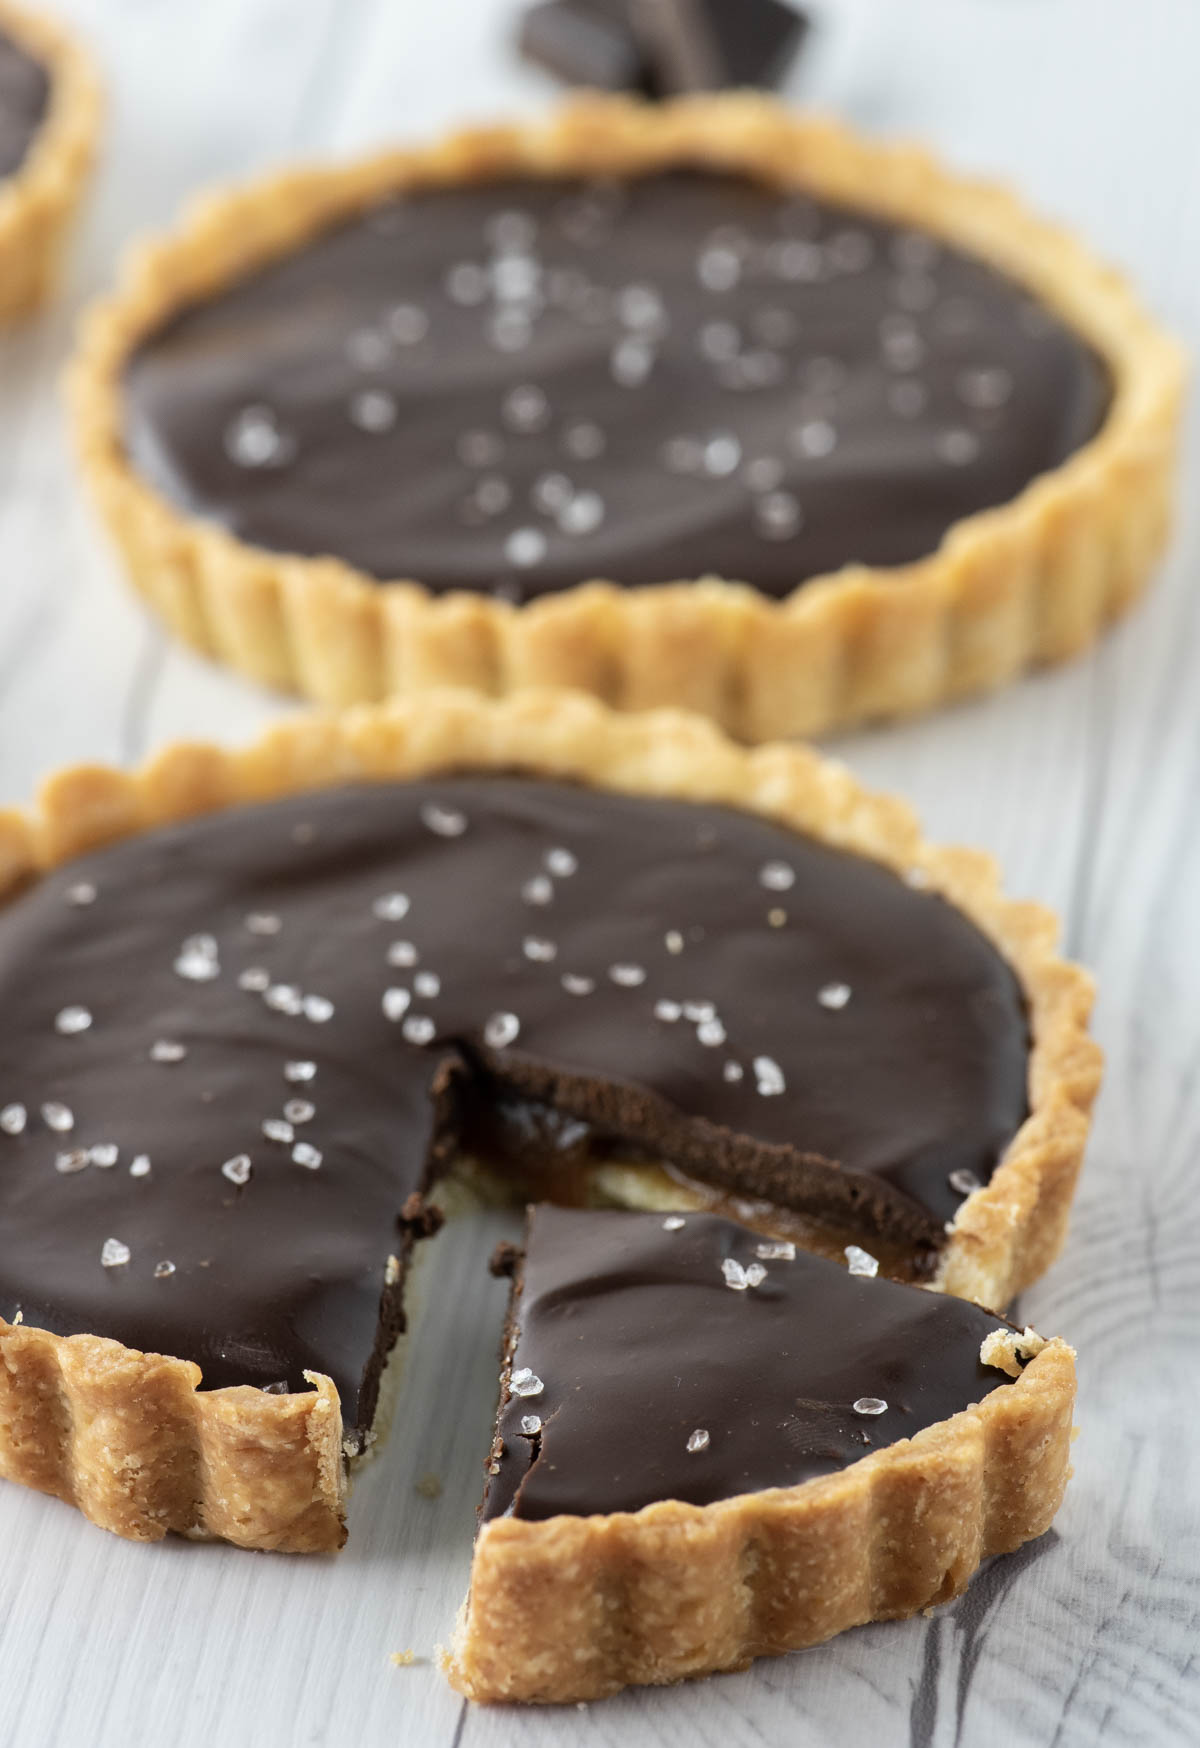
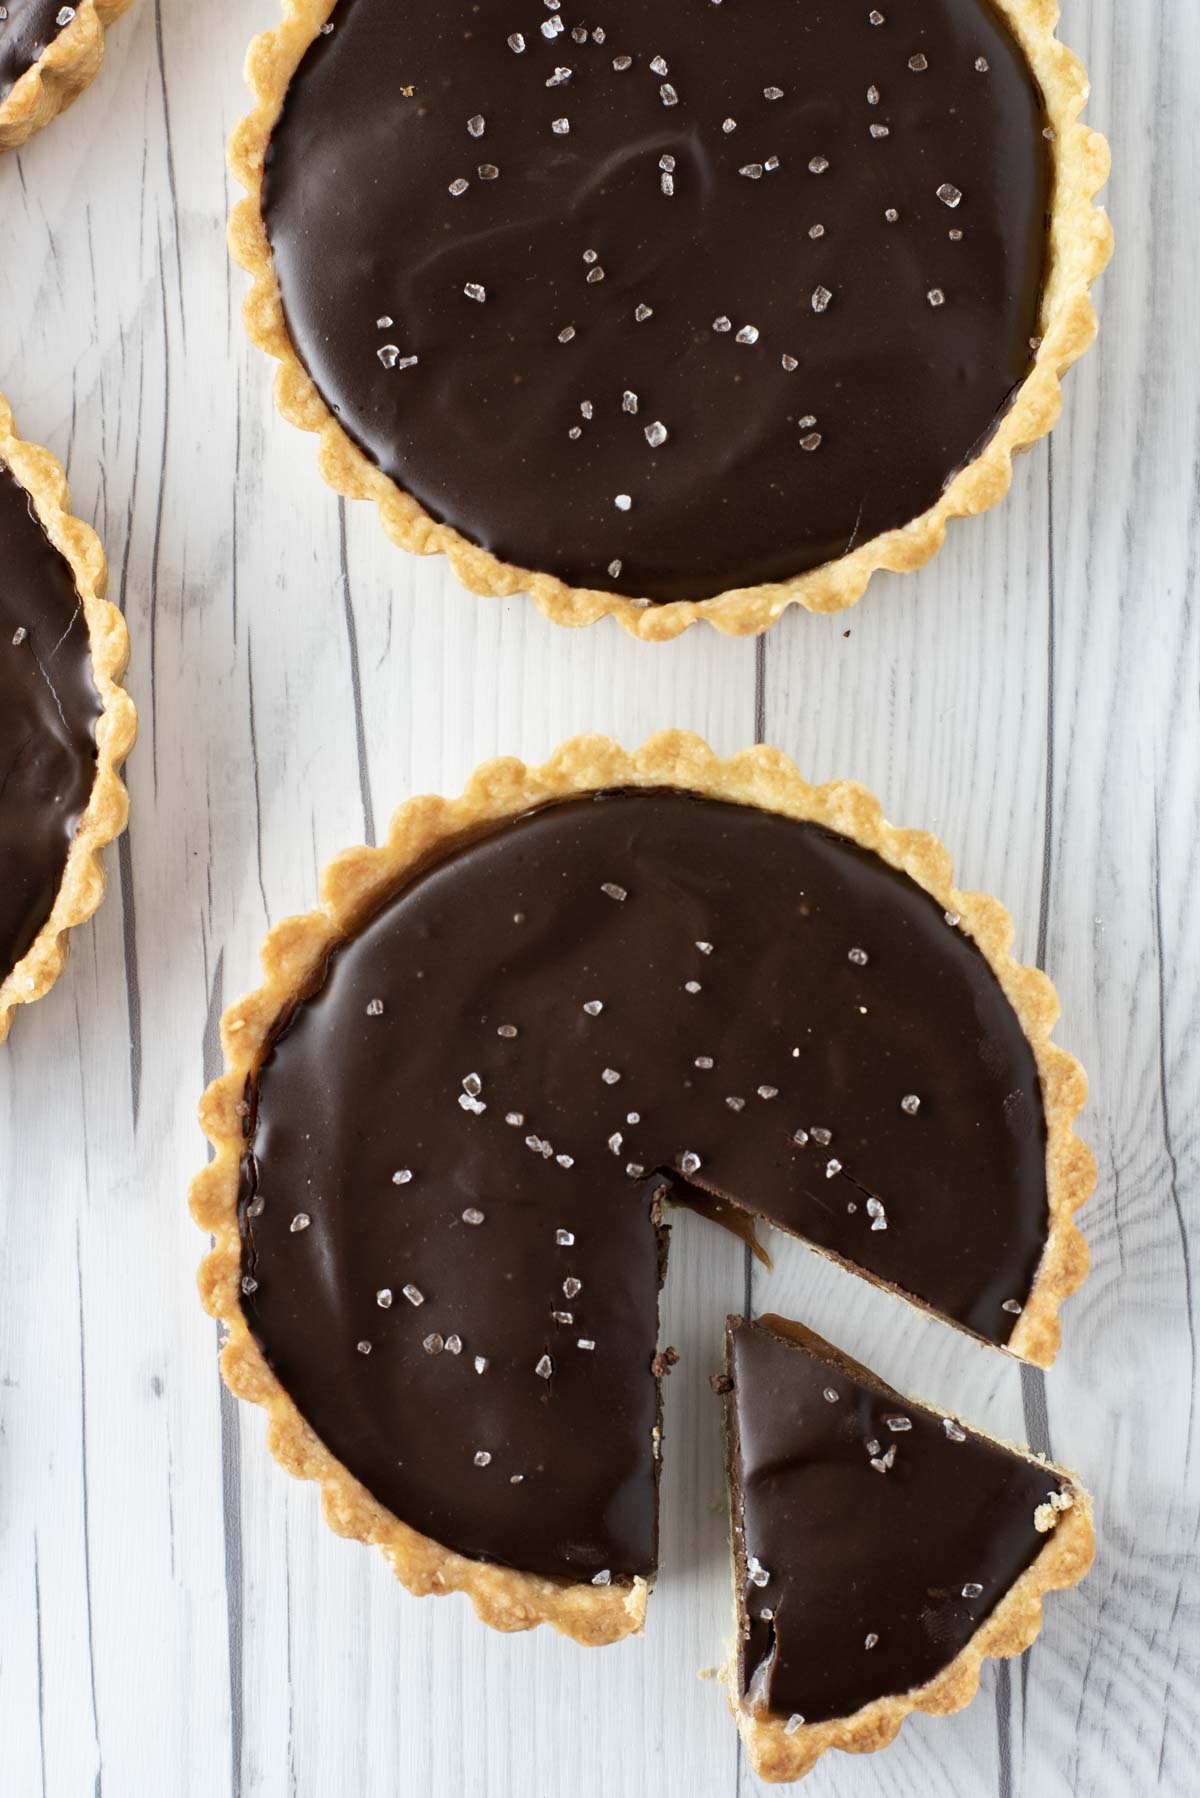
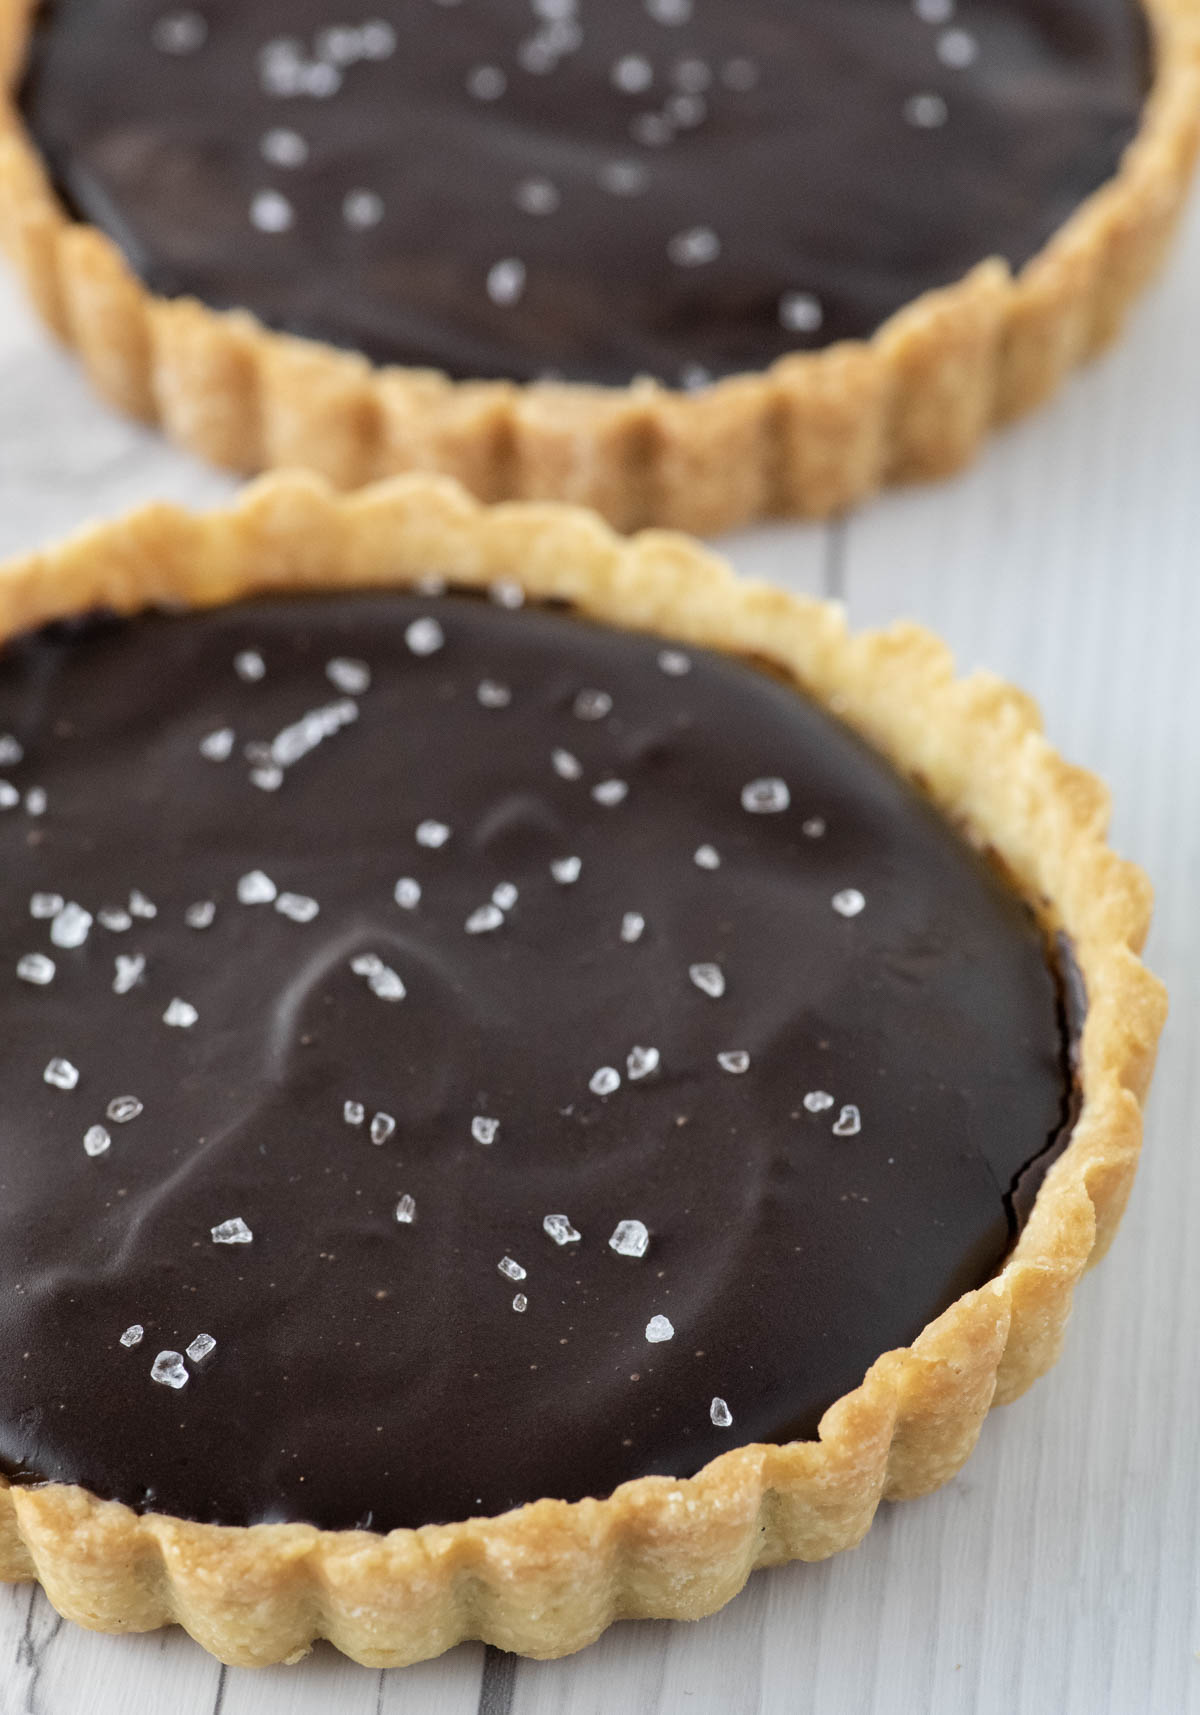
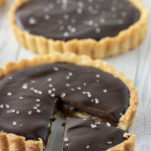
With a butter crust, homemade caramel and chocolate ganache finished off with some sea salt, this chocolate caramel tart is one tasty dessert.
So I'm here to admit something. Until today I've never made a tart before... actually I've never even made homemade pie/tart dough period. I know I know... I write a food blog and have never made pie dough. Don't get me wrong, I've made plenty of desserts and plenty of different types of dough but usually when I make a pie, I just buy the premade crust.
But today was the day with this chocolate caramel tart. Recently when I was at HomeGoods, I saw some mini tart pans that were similar to these on Amazon. I had been wanting to make a tart recipe for quite a while and seeing them for a good price was something I couldn't pass up.
Needless to say I wasn't going to make my first tart recipe without actually making dough. And honestly, it's not hard to make. I browsed probably 20 different tart dough recipes before taking the best of what I liked out of all them. This is a super buttery, melt-in-your-mouth crust, which is exactly how I like it.
But how did I decide on a chocolate caramel tart being the first tart recipe I've ever made? Well, Lauren and I knew we wanted to make a chocolate tart but I felt that we needed something extra. Originally we were going to do Baileys, but then I came across a chocolate caramel tart recipe and knew that's what we were going to make.
I mean who doesn't love caramel? And with the rich chocolate offset by some flaky sea salt? Oh and that crust! My mouth is wondering right now just writing about it.
I've mentioned in the past my mom has a cookie business, Heartsong Cookies, and her most popular cookie is her dark chocolate salted caramel cookie. So these are basically the tart form of that.
And yes I know if you're reading this and wondering why should I trust someone that's never made a tart to actually make this recipe? Well all I've got to say is, don't knock this salted caramel chocolate tart until you try it! And if you're a fan of Oreos, you can never go wrong with this Oreo tart.
Jump to:
Recipe Ingredients
- All-purpose flour - main ingredient in forming the crust.
- Granulated sugar - adds a slight sweetness to the crust and used for the homemade caramel.
- Salt - enhances the flavors of the caramel tart.
- Unsalted butter - adds flakiness to tart crust as it cooks.
- Egg - helps bind the crust.
- Vanilla extract - enhances the flavor.
- Heavy cream - helps create the caramel and chocolate ganache.
- Dark chocolate - quality chocolate is important for a tasty ganache.
Step-by-Step Instructions
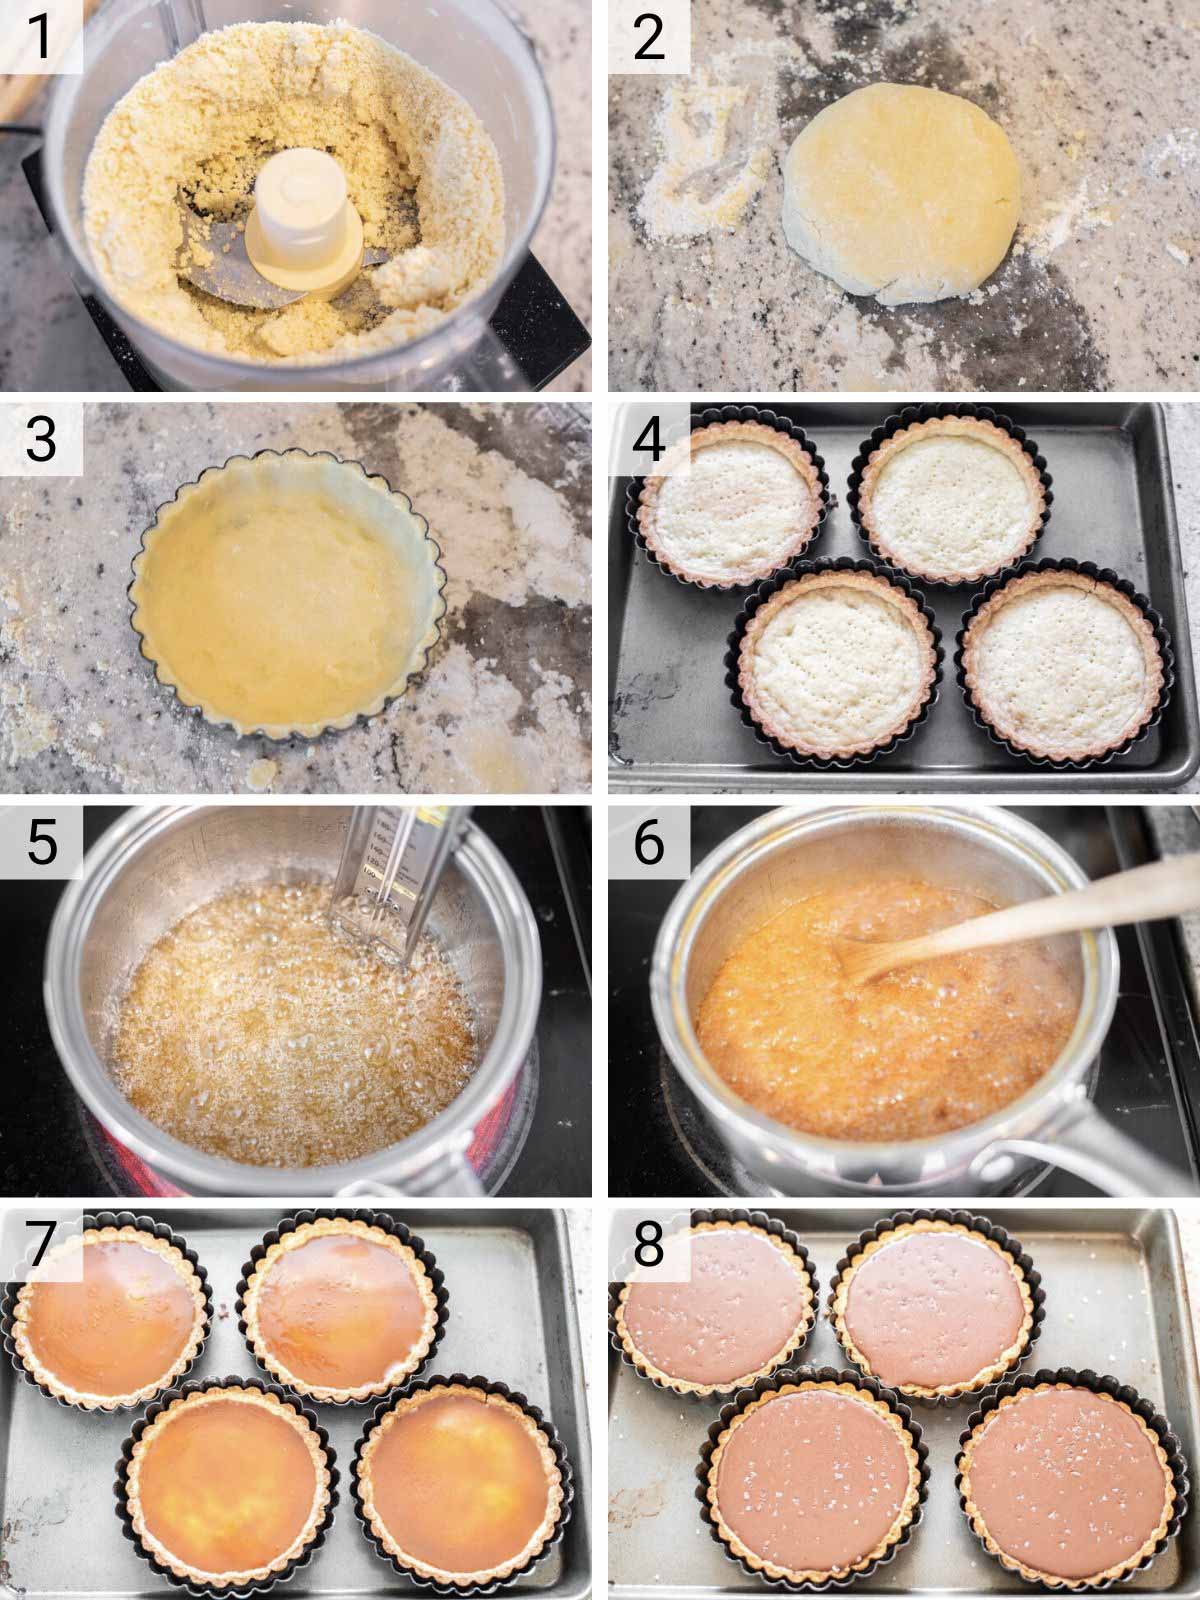
- Using a food processor, pulse together the flour, sugar and salt until combined. Add butter and pulse until mixture becomes coarse meal, about 15 pulses. In a small bowl, combine egg yolk, water and vanilla extract. Add the egg mixture to food processor and pulse until it starts to clump together. DO NOT pulse until ball is formed. It should be crumbly with large clumps of dough.
- Turn dough only a lightly floured surface and form into a ball. Flatten slightly to form a disk. Wrap in plastic wrap and put in fridge for at least 1 hour or up to 3 days.
- If using mini tart shells, divide dough into 6 equal balls. On a lightly floured surface, roll each piece of dough into a circle slightly larger in diameter than the tart shell. Press dough into each tart shell, trimming the edges with a sharp knife. Cover each with plastic wrap and place in fridge for at least 30 minutes or until firm. NOTE – If using a 9 inch tart shell, just roll out to diameter slightly large and repeat steps above.
- Preheat the oven to 375°F. Prick the bottom of each tart with a fork 2 or 3 times. Bake the shells for 25 minutes until golden brown, not dark. Rotate the tart halfway through. Remove the tartlets from the oven and let them cool completely.
- Place the cream and butter in a small saucepan over low heat and warm until the butter has melted and set aside. Place the sugar and water in a medium saucepan over low heat and cook, stirring, until the sugar is dissolved. Put a sugar thermometer in the pan and increase the heat to high. Bring to the boil and cook for about 10 minutes, without stirring, or until the temperature reaches 340°F and the mixture is a deep caramel color.
- Remove from the heat and working quickly, add the cream and butter mixture and whisk to combine (be cautious here as it will bubble up). Return to the heat and cook for another 5 minutes or until thickened slightly. Stir in salt.
- Pour caramel mixture into pastry shells and place in fridge for at least 30 minutes or until set.
- Place chocolate in a medium bowl. Heat the cream in a small saucepan over medium heat until it begins to simmer. Pour cream over chocolate. Let sit for about 2 minutes and then stir until the chocolate is completely melted and smooth. Pour over each tart until smooth and caramel is completely covered. Place back in fridge for 30 minutes or until set. Sprinkle some salt over each chocolate caramel tart and serve cold.
Pie vs. Tart: What's the Difference?
The biggest difference is in the texture. A pie crust should be flaky, light, tender and crisp. A tart crust is crumbly, rich, crisp and firm.
A pie can be just a bottom crust only, a top crust only or a top and bottom crust, while a tart is always a bottom crust. Pies are also always served in the dish they are baked in, while tarts are removed from the pan before being served.
What is Blind Baking?
So I did not blind bake as I was using mini tart pans and I just poked the dough with a fork before baking. They rose slightly while baking but settled down when I removed.
You blind bake by adding dried beans or pie weights to the base and bake for 10-15 minutes so it doesn't rise. Then remove the weights and bake for another 10 minutes or until the crust is golden brown.
One key though is to make sure the dough is cold and rested so it doesn't shrink when baking.
Can I Use this Tart Recipe for a 9" Tart Pan?
Yes. This recipe works for six 3.5" tart pans or one 9" tart pan.
Pro Tips/Recipe Notes
- The homemade tart crust is actually super easy to make and you will notice the difference. But you can skip and use store-bought pie crust if needed.
- Use a candy thermometer so you know when your caramel is ready to have the cream added. Once it reaches 340°F, it is ready.
- Use quality dark chocolate as it contributes to the flavor of the tarts.
- You can store the salted caramel chocolate tart in an airtight container for a week in the fridge or 3 months in the freezer.
Other Dessert Recipes
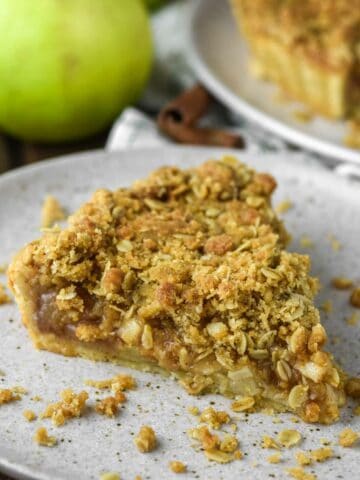
- Easy Apple Crumb Pie
- Congo Squares
- Peanut Butter Chocolate Chip Skillet Cookie
- Ginger Cookies
- Apple Crumble Tart
- Blueberry Crisp
If you’ve tried this Chocolate Caramel Tart or any other recipe on Chisel & Fork, please let me know how it turned out in the comments below. You can't go wrong with this chocolate raspberry tart either! You can also follow me on Facebook, Instagram, Pinterest and YouTube to see more tasty meals and anything else I'm up to.
Chocolate Caramel Tart
Ingredients
Crust
- 1 ½ cups all-purpose flour
- ¼ cup granulated sugar
- ¼ teaspoon salt
- 10 tablespoon cold unsalted butter, cut into cubes
- 1 egg yolk
- 2 tablespoon cold ice water
- 1 teaspoon vanilla extract
Caramel Filling
- 1 cup heavy cream
- 1 stick (½ cup) unsalted butter
- 1 ½ cups granulated sugar
- ½ cup water
- ½ teaspoon flaky sea salt
Chocolate Ganache
- 4 oz dark chocolate
- ½ cup heavy cream
- ½ teaspoon flaky sea salt
Instructions
Crust
- Using a food processor, pulse together the flour, sugar and salt until combined. Add butter and pulse until mixture becomes coarse meal, about 15 pulses.
- In a small bowl, combine egg yolk, water and vanilla extract. Add the egg mixture to food processor and pulse until it starts to clump together. DO NOT pulse until ball is formed. It should be crumbly with large clumps of dough.
- Turn dough only a lightly floured surface and form into a ball. Flatten slightly to form a disk. Wrap in plastic wrap and put in fridge for at least 1 hour or up to 3 days.
- If using mini tart shells, divide dough into 6 equal balls. On a lightly floured surface, roll each piece of dough into a circle slightly larger in diameter than the tart shell. Press dough into each tart shell, trimming the edges with a sharp knife. Cover each with plastic wrap and place in fridge for at least 30 minutes or until firm. NOTE - If using a 9 inch tart shell, just roll out to diameter slightly large and repeat steps above.
- Preheat the oven to 375°F. Prick the bottom of each tart with a fork 2 or 3 times. Bake the shells for 25 minutes until golden brown, not dark. Rotate the tart halfway through. Remove the tartlets from the oven and let them cool completely.
Caramel Filling
- Place the cream and butter in a small saucepan over low heat and warm until the butter has melted and set aside.
- Place the sugar and water in a medium saucepan over low heat and cook, stirring, until the sugar is dissolved. Put a sugar thermometer in the pan and increase the heat to high. Bring to the boil and cook for about 10 minutes, without stirring, or until the temperature reaches 340°F and the mixture is a deep caramel color.
- Remove from the heat and working quickly, add the cream and butter mixture and whisk to combine (be cautious here as it will bubble up). Return to the heat and cook for another 5 minutes or until thickened slightly. Stir in salt.
- Pour caramel mixture into pastry shells and place in fridge for at least 30 minutes or until set.
Chocolate Ganache
- Place chocolate in a medium bowl. Heat the cream in a small saucepan over medium heat until it begins to simmer. Pour cream over chocolate. Let sit for about 2 minutes and then stir until the chocolate is completely melted and smooth. Pour over each tart until smooth and caramel is completely covered. Place back in fridge for 30 minutes or until set. Sprinkle some salt over tart and serve cold.
Notes
- The homemade tart crust is actually super easy to make and you will notice the difference. But you can skip and use store-bought pie crust if needed.
- Use a candy thermometer so you know when your caramel is ready to have the cream added. Once it reaches 340°F, it is ready.
- Use quality dark chocolate as it contributes to the flavor of the tarts.
- You can store the caramel tart in an airtight container for a week in the fridge or 3 months in the freezer.
Chris says
These look delicious!