• Skip to primary navigation
  • Skip to main content
  • Skip to primary sidebar

Chisel & Fork logo

  • Home
  • About
  • Recipes
  • DIY
  • Contact Us
  • Privacy Policy
menu icon
go to homepage
subscribe
search icon
Homepage link
  • Home
  • About
  • Recipes
  • DIY
  • Contact Us
  • Privacy Policy
    • Facebook
    • Instagram
    • Pinterest
    • YouTube
  • ×

    You Are Here: Home → DIY

    Bathroom Wall Organizer

    August 6, 2017 | Updated August 28, 2019 by Ryan Leave a Comment

    880 shares

    This post may contain affiliate links. Please read my disclosure.

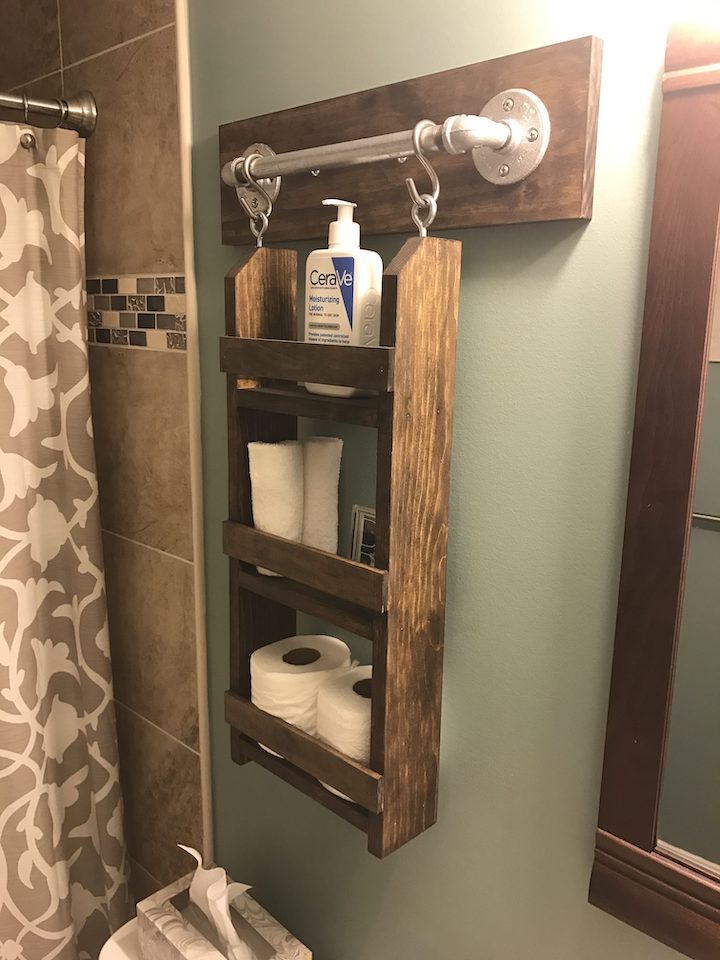
    This bathroom wall organizer is actually hung on the wall and is the perfect storage for a smaller bathroom. Even better, it's a DIY project that can be completed in an hour.

    side shot of bathroom wall organizer

    When we bought our house 6 months ago, I started looking for any excuse to build things for the house. I knew I had wanted to do some type of storage for our bathroom that could go on the wall and take away some blank wall space which I hate. So naturally the first place I looked was Ana White and I found the perfect bathroom wall hanging organizer. The original plans can be found here.

    bathroom wall organizer before being stained

    What makes this great is it's easy to put together and looks awesome! If you don't have some type of saw to make the few cuts that need to be made you can just have someone at Home Depot or Lowes make the cuts for you. For me, I like the industrial look of wood and pipes so this was the perfect project. While Ana White's design is meant for a bigger bathroom, I needed to downsize it slightly so it could fit in our guest bathroom, so you can change the size around as needed.

    close-up of bathroom wall organizer

    This bathroom wall hanging organizer is something that can be done in an hour (more if you stain the wood). So get out there and give this a try. Don't be afraid to do your own project!

    bathroom wall organizer hanging on wall

    Bathroom Wall Organizer Shopping List:

    • (1) 1" x 4" x 8'
    • (1) 1" x 6" x 2'
    • (1) ¼" x 2" x 3'
    • (1) ¾" x 12" iron pipe
    • (2) ¾" iron floor flange
    • (2) ¾" 90 degree elbow
    • 2 eye hooks
    • 2 S hooks
    • 2" countersunk screws
    • 1" finish nails
    • 3" drywall screws
    • Stain or paint
    • Wood glue

    Tools

    • Miter saw
    • Power drill
    • Hand sander and sandpaper
    • Hamer

    Cut List

    • (2) - 1" x 4" @ 24"
    • (3) - 1" x 4" @ 8 ½"
    • (3) - ¼" x 2" @ 10"
    • (1) - 1" x 6" @ 19 ½"

    How to Make Bathroom Wall Organizer:

    Step 1:
    Make all cuts listed above.

    Step 2:
    If you want you can cut a notch off the top for the two 24" sides to give it more character but not necessary.

    Step 3:
    If you're going to stain the wood, this is the time to do it and sand it down. It can also be painted.

    Step 4:
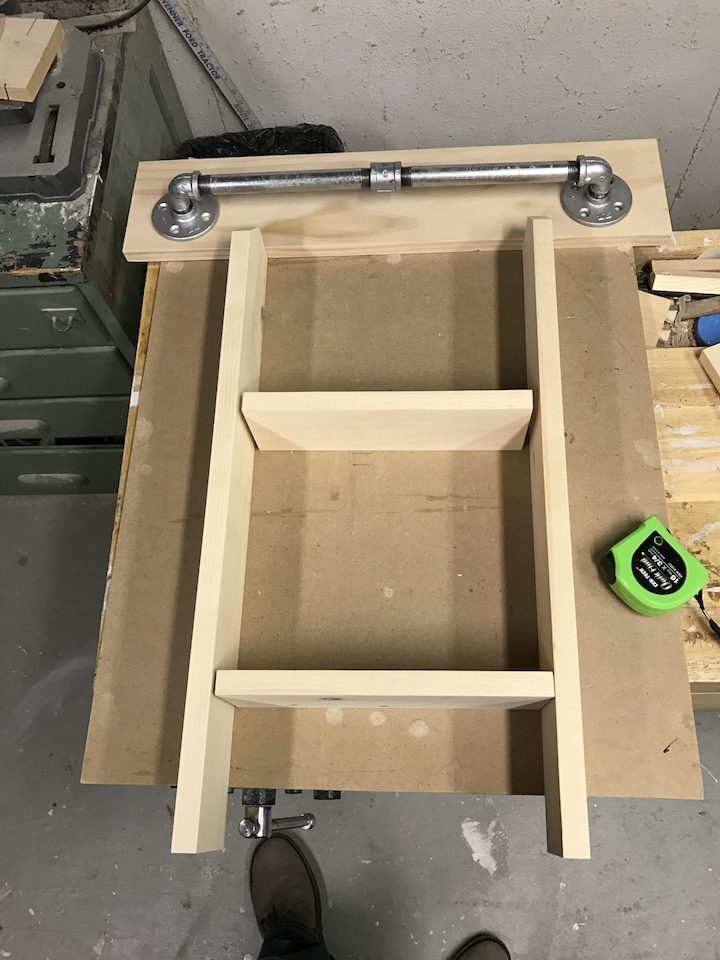
    Measure ¾" from bottom on each 24" side and add 8 ½" board for shelf. You can do this by countersunk screws on the outside or pocket hole screws on bottom of shelf.

    Step 5:
    Measure 7 ½" from bottom shelf to put in middle shelf. Repeat with top shelf being 7 ½" from middle shelf.

    Step 6:
    Nail ¼" x 2" rails ¾" above each shelf with finish nails and glue.
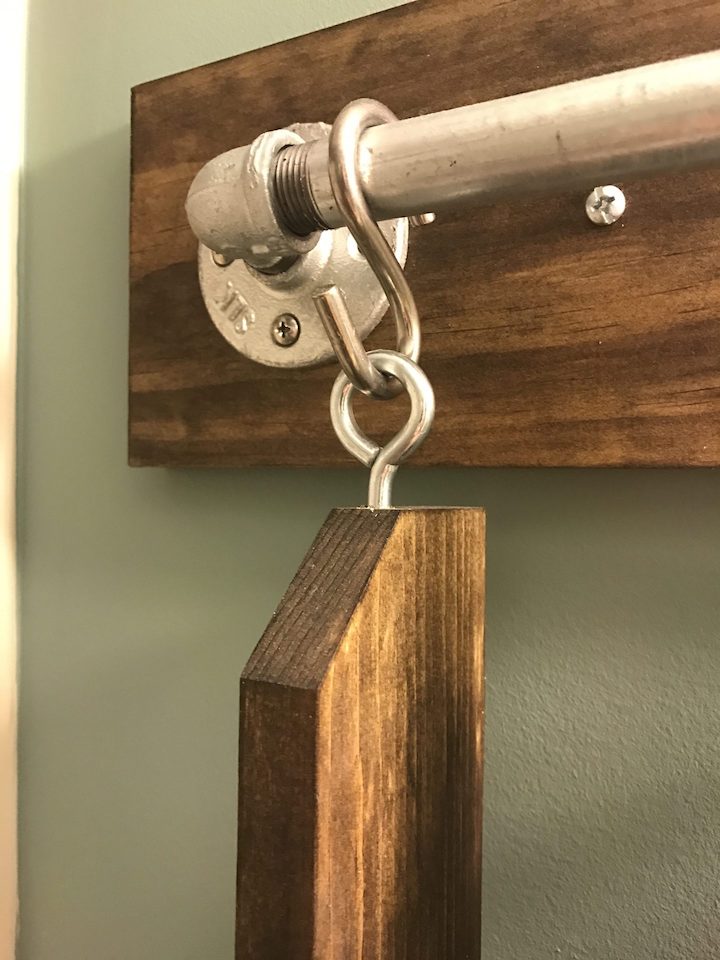
    Step 7:
    Add eye hooks and 2 hooks to top of side boards.

    Step 8:
    Use drywall screws and put 1" x 6" board onto wall where you want it.

    Step 9:
    Put together iron piping with 90 degree elbows and floor flange and screw into board.

    Step 10:
    Attach wall hanging and use it to your liking!

    Other Projects:

    • 6 Cube Bookshelf
    • DIY Wood Shelves
    • Spice Drawer Organizer
    • Sliding Door Entertainment Center
    • X Side Table
    « Crater Lake Pyrography Art
    Mediterranean Lasagna »
    880 shares

    Receive Top 25 Recipes

    Reader Interactions

    Leave a Reply Cancel reply

    Your email address will not be published. Required fields are marked *

    Recipe Rating


    Primary Sidebar

    About Chisel & Fork

    ryan standing in kitchen

    Hey there! Welcome to Chisel & Fork, a blog with tasty recipes and DIY projects. I'm Ryan and here you'll find hundreds of recipes ranging from true comfort food to vegan. Oh and if you like woodworking, you might just find your next inspiration. Read More About Chisel & Fork…

    Get Your Free Copy of My Top 25 Most Popular Recipes

    title page of ecookbook

    Easter Day Recipes

    • orange roll on spatula above rolls in baking dish
      Orange Rolls
    • overhead shot of smoked spatchcock chicken on wood board
      Smoked Spatchcock Chicken
    • mini ham and cheese quiche stacked on cutting board
      Mini Ham and Cheese Quiche
    • chocolate hazelnut biscotti stacked on white plate
      Chocolate Hazelnut Biscotti

    Popular Recipes

    • chocolate chip scones stacked on white plate
      Chocolate Chip Scones
    • spoon lifting out chicken paprikash
      Chicken Paprikash
    • close-up of german chicken schnitzel on white plate
      Chicken Schnitzel
    • close-up of pork tossed in sweet soy ginger garlic sauce on bed of white rice
      Mongolian Pork

    Featured In

    logos of places where Chisel & Fork has been featured

    Footer

    ^ back to top

    Information

    • About
    • Privacy Policy
    • Accessibility

    Newsletter

    • Sign Up! for emails and updates
    • Recipes
    • DIY

    Contact

    • Contact
    • FAQ
    • Work With Us

    As an Amazon Associate I earn from qualifying purchases.

    Copyright © 2022 Chisel & Fork

    880 shares